


How to Clean Ceramic Tiles Naturally: A Step-by-Step Guide
Cleaning ceramic tiles seems easy with the right products and a little elbow grease. Yet nearly 90 percent of people use harsh chemicals that secretly damage their tiles over time. The real trick is choosing natural cleaning tools that protect your tile’s shine and last longer than any spray you find at the store.
Table of Contents
- Step 1: Gather Your Cleaning Supplies
- Step 2: Prepare the Tile Surface
- Step 3: Apply the Cleaning Solution
- Step 4: Scrub the Tiles Effectively
- Step 5: Rinse and Dry the Tiles
- Step 6: Inspect for Spot Cleaning
Quick Summary
| Key Point | Explanation |
|---|---|
| 1. Gather effective cleaning supplies. | Assemble white vinegar, warm water, microfiber cloths, and baking soda for optimal cleaning performance. |
| 2. Prepare tile surfaces thoroughly. | Sweep or vacuum debris to prevent scratching and assess grout conditions before cleaning. |
| 3. Apply a gentle cleaning solution. | Mix one cup of vinegar with one gallon of warm water for safe, effective cleaning. |
| 4. Scrub with care and precision. | Use a soft-bristled brush or cloth to avoid damaging tiles while effectively removing stains. |
| 5. Rinse and dry tiles properly. | Rinse with clean water and dry with microfiber towels to prevent water spots and streaks. |
Step 1: Gather Your Cleaning Supplies
Cleaning ceramic tiles effectively starts with assembling the right tools and supplies. Before diving into the cleaning process, you will want to collect a strategic set of natural and gentle cleaning materials that will protect your tiles while removing dirt and grime. The goal is to create a cleaning kit that is both environmentally friendly and highly effective.
Your essential cleaning arsenal should include white vinegar, which serves as a powerful natural disinfectant and degreaser. You will also need warm water, a clean microfiber mop or soft cloth, baking soda for tackling tougher stains, and a large bucket for mixing your cleaning solution. Opt for soft materials that will not scratch the delicate ceramic surface. A soft-bristled brush can be useful for grout lines and hard-to-reach corners, ensuring you can clean every nook and cranny without causing damage.
Consider gathering some additional items that can enhance your cleaning process. A spray bottle can help you apply cleaning solutions more precisely, while distilled water can prevent mineral deposits on your tiles. Rubber gloves will protect your hands during the cleaning process, and old towels or rags can be helpful for drying and buffing tiles after cleaning. Learn more about deep cleaning techniques that can complement your tile maintenance routine.
Preparing your supplies in advance not only makes the cleaning process smoother but also ensures you can tackle the job efficiently and effectively. Take a few moments to organize your cleaning materials, and you will be well on your way to sparkling clean ceramic tiles that look as good as new.
Below is a reference table summarizing the essential natural cleaning supplies, tools, and their specific purposes for cleaning ceramic tiles effectively.
| Item | Purpose | Notes |
|---|---|---|
| White vinegar | Natural disinfectant and degreaser | Mixes with warm water for cleaning |
| Warm water | Dilutes vinegar, enhances cleaning | Use distilled to avoid mineral spots |
| Microfiber mop/cloth | Gently cleans surfaces without scratching | Soft materials protect tile finish |
| Baking soda | Tackles stubborn stains | Can be made into a paste |
| Soft-bristled brush | Cleans grout and corners | Avoids damaging tile or grout |
| Bucket | For mixing and carrying solutions | Large enough for 1 gallon solution |
| Spray bottle | Applies solution to targeted areas | Useful for spot cleaning |
| Rubber gloves | Protects hands during cleaning | Optional, for comfort/safety |
| Old towels/rags | For drying and buffing tiles after cleaning | Use clean, absorbent cloths |
Step 2: Prepare the Tile Surface
Preparing your ceramic tile surface is a critical step that sets the foundation for a thorough and effective cleaning process. Before applying any cleaning solution, you need to remove loose debris and assess the current condition of your tiles and grout. Proper surface preparation will ensure that your cleaning efforts are maximized and prevent potential damage during the cleaning process.
Begin by sweeping or vacuuming the ceramic tile area thoroughly, paying special attention to corners, edges, and areas around fixtures where dust and debris tend to accumulate. Use a soft-bristled broom or a vacuum with a soft attachment to prevent scratching the tile surface. This initial removal of loose dirt prevents potential scratching when you start wet cleaning and helps you identify any specific problem areas that might require extra attention.
Next, inspect the tiles and grout lines for any visible stains, grime buildup, or potential damage. Look closely for areas with stubborn dirt, discoloration, or signs of mold and mildew. These spots will require targeted treatment during your cleaning process. If you notice any cracked tiles or significantly damaged grout, you might want to address these issues before proceeding with a deep clean.
INFOGRAPHIC:infographic_content] [Read our comprehensive guide on deep cleaning techniques to understand more about surface preparation and maintenance.
To ensure optimal cleaning results, create a clear workspace by moving any movable objects like rugs, mats, or small furniture pieces away from the tile area. This will give you unobstructed access to the entire surface and prevent accidentally spreading dirt or cleaning solutions onto other surfaces. With your tiles now free of loose debris and your workspace prepared, you are ready to move on to the next stage of the cleaning process.
The table below provides an overview of each step in the natural ceramic tile cleaning process, including the primary action, estimated time, and expected difficulty for each stage.
| Step | Main Action | Estimated Time | Difficulty |
|---|---|---|---|
| Gather Supplies | Assemble tools and materials | 5-10 minutes | Easy |
| Prepare Tile Surface | Sweep/vacuum and inspect | 10-15 minutes | Easy |
| Apply Cleaning Solution | Mix/apply vinegar solution | 10-15 minutes | Easy |
| Scrub Tiles | Scrub tiles and grout as needed | 15-25 minutes | Moderate |
| Rinse and Dry | Rinse with clean water; dry surfaces | 10-15 minutes | Easy |
| Inspect for Spot Cleaning | Examine and treat remaining spots | 10 minutes | Easy |
Step 3: Apply the Cleaning Solution
Applying the right cleaning solution is crucial for effectively cleaning ceramic tiles without causing damage. The key is to create a gentle yet powerful natural cleaning mixture that will lift dirt and grime while preserving the tile’s pristine surface. Begin by mixing your homemade cleaning solution in the large bucket you prepared earlier. The most effective natural cleaner combines white vinegar and warm water in a strategic ratio that ensures thorough cleaning without harsh chemicals.
Create your cleaning solution by mixing one cup of white vinegar with one gallon of warm water. This natural solution provides excellent cleaning power without the risks associated with harsh commercial cleaners.
If you are dealing with particularly stubborn areas or greasy spots, add a tablespoon of baking soda to the mixture for extra cleaning strength. Stir the solution gently to ensure proper mixing, being careful not to create excessive foam that could make application more difficult.
When applying the solution, use your microfiber mop or soft cloth to distribute the cleaner evenly across the tile surface. Work in small sections to ensure thorough coverage and prevent the solution from drying before you can clean it. Move systematically across the floor, starting from the farthest corner and working your way towards the exit to avoid walking on freshly cleaned areas. For grout lines and tighter spaces, use the soft-bristled brush to gently work the solution into these more challenging areas. Discover more about deep cleaning techniques that can help you maintain your ceramic tiles more effectively.
Be mindful of the amount of liquid you are using. The goal is to clean thoroughly without saturating the tiles or grout, which could lead to water damage or mold growth. Wring out your mop or cloth so it is damp but not dripping wet, ensuring a controlled and effective cleaning process that protects your ceramic tiles while removing dirt and grime.
Step 4: Scrub the Tiles Effectively
Scrubbing ceramic tiles requires a delicate balance between thorough cleaning and protecting the surface from potential damage. The goal is to remove dirt and grime without scratching or compromising the tile’s beautiful finish. Begin by focusing on your soft-bristled brush or microfiber cloth, which will be your primary tool for gently lifting stubborn dirt and stains without causing abrasions.
Approach the scrubbing process systematically, working in small sections and using circular motions that provide even pressure across the tile surface. For grout lines and more challenging areas, use your soft-bristled brush with gentle but firm strokes. Pay special attention to high-traffic zones and areas near sinks or appliances where dirt tends to accumulate more heavily. The key is consistent, gentle pressure rather than aggressive scrubbing. If you encounter particularly stubborn stains, create a paste using baking soda and a small amount of water, applying it directly to the troublesome spot and allowing it to sit for a few minutes before gently scrubbing.
For areas with built-up grime or older stains, you might need to apply slightly more focused effort. Use your soft brush to work the cleaning solution into these areas, being careful not to use excessive force that could damage the tile’s glaze. Explore our deep cleaning techniques for additional insights into maintaining surfaces effectively. As you scrub, periodically rinse your cleaning tool to prevent spreading dirt around and to ensure you are actually removing grime rather than just moving it across the surface.
Verify your cleaning progress by stepping back and examining the tiles from different angles and lighting conditions. Look for any remaining dull spots, streaks, or areas that might need additional attention. Your tiles should appear uniformly clean, with a consistent shine that indicates you have successfully removed dirt and restored their natural beauty.
Step 5: Rinse and Dry the Tiles
Rinsing and drying your ceramic tiles is a critical final step that ensures a streak-free, sparkling clean surface. The goal is to remove any remaining cleaning solution and prevent water spots or mineral deposits from dulling your tiles’ beautiful finish. Begin by preparing clean, warm water in a separate bucket, which you will use to thoroughly rinse away the vinegar and baking soda cleaning solution you applied earlier.
Using a clean microfiber mop or soft cloth, carefully rinse the entire tile surface with the fresh water. Work systematically across the floor, starting from the farthest corner and moving towards the exit, ensuring you remove all traces of the cleaning solution. Pay special attention to grout lines and corners where cleaning solution might accumulate. Avoid using excess water that could seep into grout lines or potentially damage the underlying surface. If you have a spray bottle, you can use it to apply rinse water more precisely and control the amount of moisture on the tiles.
Drying is equally important in preventing water spots and maintaining your tiles’ pristine appearance. Use clean, dry microfiber towels or soft cotton cloths to thoroughly dry the surface. Gently pat and wipe the tiles, working in the same systematic manner as your rinsing process. For larger areas, you might want to use multiple dry towels to ensure complete moisture removal. Learn more about maintaining clean surfaces to extend the life of your ceramic tiles.
To verify your cleaning is complete, check the tiles from different angles and under various lighting conditions. The surface should appear uniformly clean, with a consistent shine and no visible water spots or streaks. Run your hand lightly across the tiles to ensure they feel smooth and completely dry, signaling you have successfully completed the cleaning process.
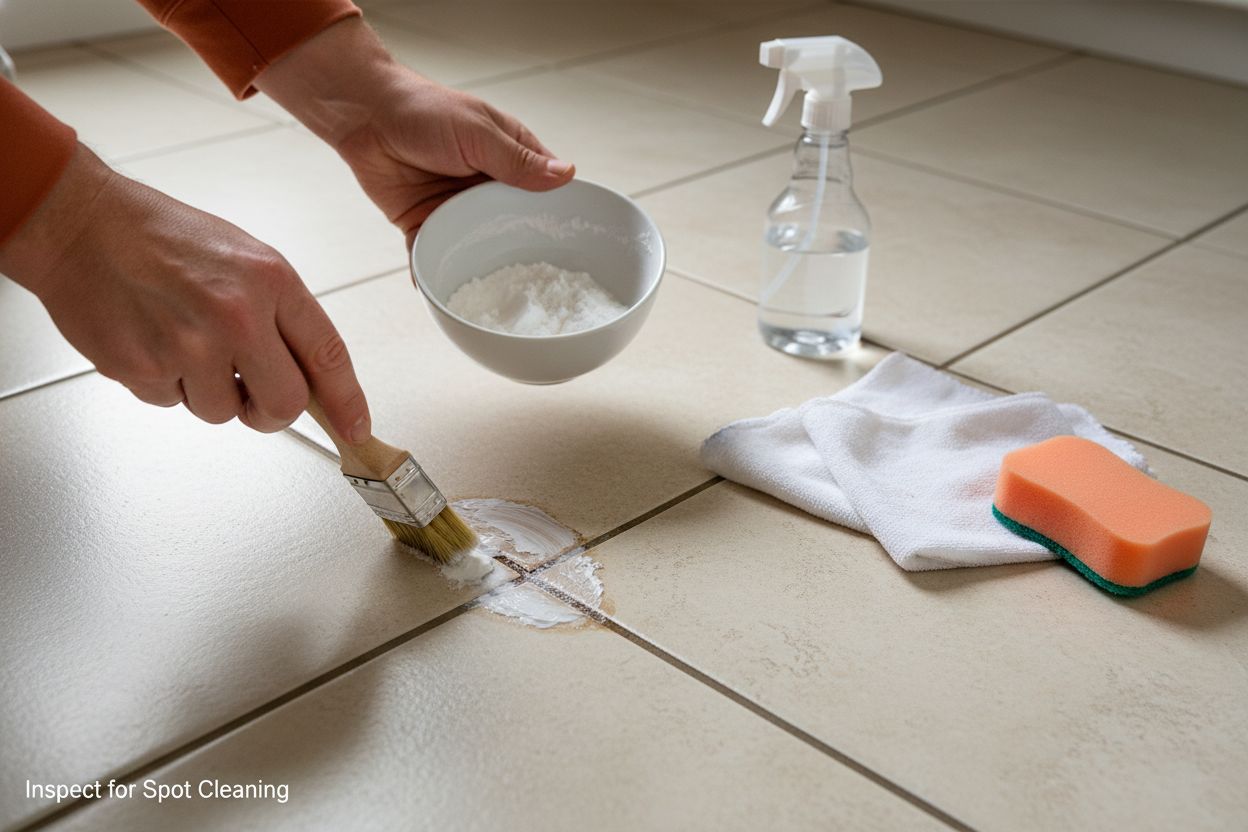
Step 6: Inspect for Spot Cleaning
After completing the initial cleaning process, a thorough inspection is crucial to ensure every inch of your ceramic tiles receives proper attention. The final spot cleaning phase transforms a good cleaning job into an exceptional one, addressing those stubborn areas that might have resisted your initial efforts. Begin by examining the tiles systematically, using natural and artificial lighting to reveal any remaining dirt, stains, or discoloration that might have been overlooked during the previous cleaning steps.
For persistent stains or difficult spots, create a targeted cleaning paste using baking soda and a minimal amount of water. This natural solution provides extra cleaning power without risking damage to your ceramic tiles. Apply the paste directly to stubborn areas, using a soft-bristled brush to gently work it into the stain. Allow the paste to sit for a few minutes, which gives the baking soda time to break down tough grime. For grease or oil-based stains, a small amount of white vinegar can be particularly effective in lifting the residue without harsh chemicals.
Pay special attention to high-traffic areas, corners, and spaces near fixtures where dirt tends to accumulate more persistently. Grout lines often require extra care, so use your soft-bristled brush to carefully clean these narrow spaces. Work methodically, using gentle circular motions to lift dirt without causing abrasion. Discover more about comprehensive cleaning techniques to maintain your surfaces in top condition.
To verify the effectiveness of your spot cleaning, step back and view the tiles from multiple angles and under different lighting conditions. The surface should appear uniformly clean, with no visible spots, streaks, or areas of discoloration. Run your hand lightly across the tiles to feel for any remaining rough patches, ensuring a smooth, pristine finish that reflects the care and attention you’ve invested in maintaining your ceramic tiles.
Get Lasting Shine and Protection for Your Ceramic Tiles
Are you tired of seeing your hard work fade away quickly after a deep clean? You followed every step to naturally clean your ceramic tiles and restore their beauty. However, stubborn stains, dull spots, and grime often return faster than you expect. That frustration is real, and it can leave you feeling like your efforts are never enough. The article showed you how to scrub, rinse, and spot clean but keeping your tiles spotless and protected week after week requires more than just elbow grease.

Take your efforts to the next level and achieve a cleaner that truly lasts. Upgrade from basic cleaning to cutting-edge care with Shiny Kings. Our world-class ceramic coatings and cleaning solutions are specially designed for lasting protection. These advanced products simplify tile care by repelling stains and buildup so your tiles keep their brilliant finish longer. Ready for results you can see and feel? See how our ceramic coating solutions safeguard your home. Act now to enjoy effortless maintenance and gleaming tiles every day.
Frequently Asked Questions
How often should I clean my ceramic tiles naturally?
It’s best to clean your ceramic tiles at least once a month to maintain their appearance and prevent grime buildup. High-traffic areas may require more frequent cleaning.
What natural ingredients can I use to clean ceramic tiles?
You can use white vinegar, warm water, and baking soda as effective natural cleaners. This combination helps lift dirt while being gentle on the tiles.
How do I remove stubborn stains from ceramic tiles?
For stubborn stains, create a paste using baking soda and water, apply it to the affected area, and let it sit for a few minutes before scrubbing gently. This helps break down tough grime without damaging the tile surface.
Can I use essential oils in my tile cleaning solution?
Yes, you can use a few drops of essential oils like lemon or tea tree oil in your cleaning solution for added fragrance and antimicrobial properties. Just make sure they are compatible with the ingredients used for cleaning.