


How to Seal Concrete Driveway for Lasting Protection
Sealing a concrete driveway sounds simple but it can make a massive difference for your home’s curb appeal and durability. Most people forget that skipping just one prep step can slash the sealant’s life in half. What really stands out is that with careful prep and the right sealant, you can get up to 10 years of protection from a single application. That kind of longevity turns what feels like a weekend chore into an investment you notice for the next decade.
Table of Contents
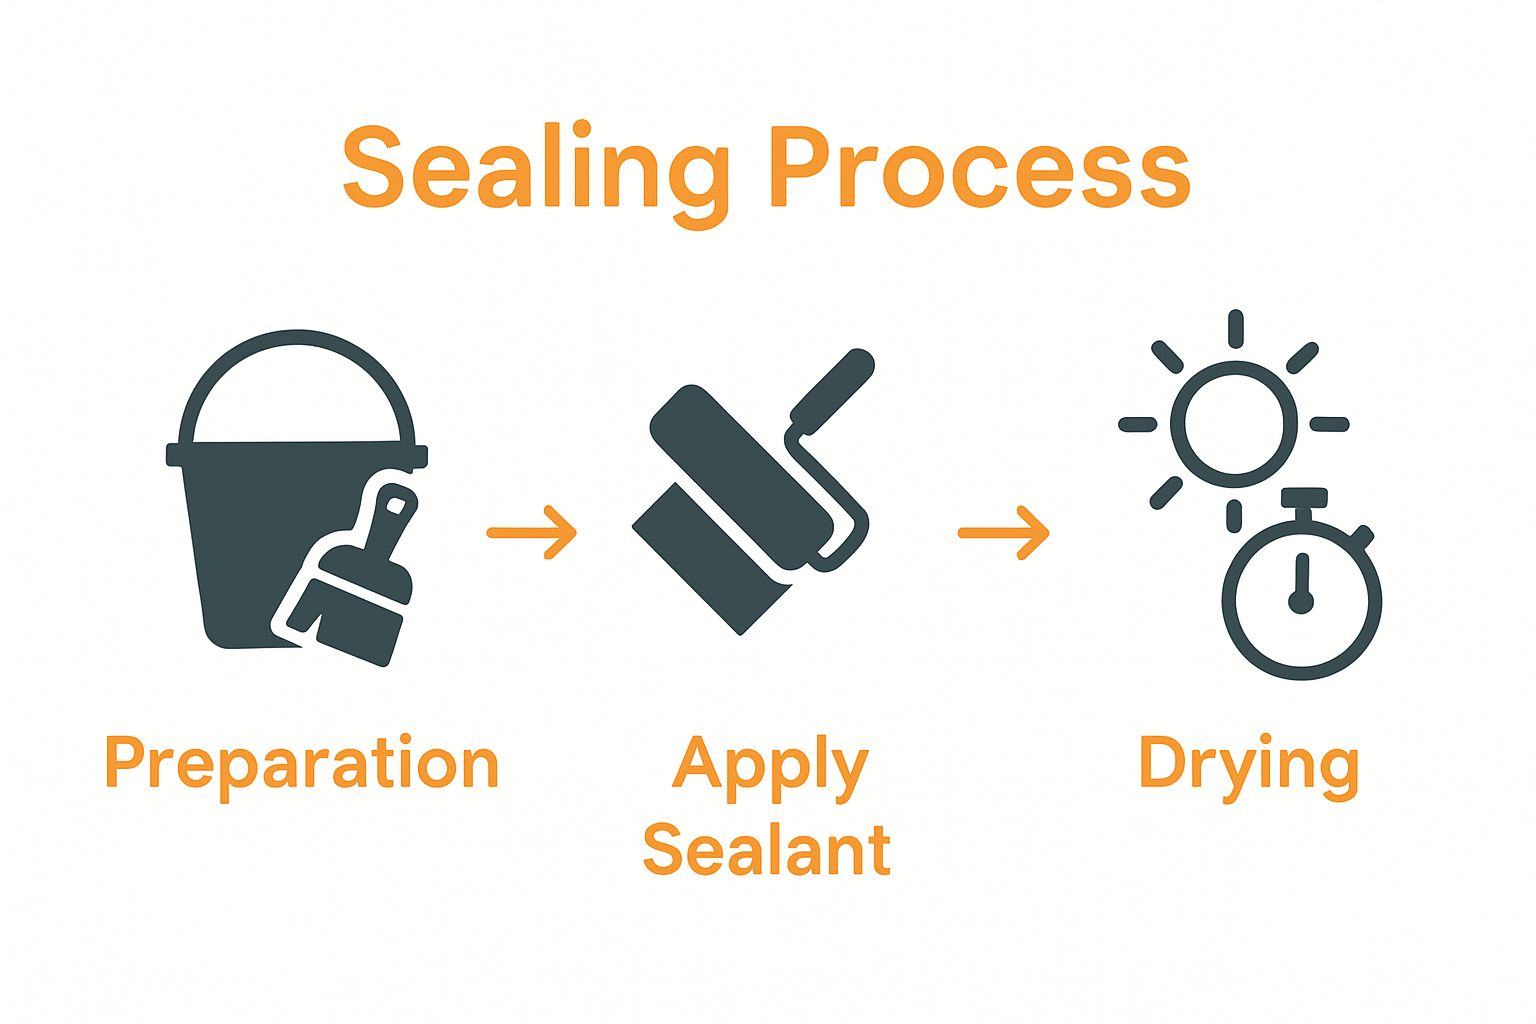
- Step 1: Prepare The Concrete Surface
- Step 2: Choose The Right Sealant
- Step 3: Apply The Sealant Evenly
- Step 4: Allow Sufficient Drying Time
- Step 5: Perform A Final Inspection
Quick Summary
| Key Point | Explanation |
|---|---|
| 1. Thoroughly clean concrete prior to sealing | Remove debris and clean with a concrete degreaser to ensure proper sealant adhesion and effectiveness. |
| 2. Select the right sealant type | Choose a sealant suited for your local climate and driveway condition for optimal long-lasting performance. |
| 3. Apply sealant in thin, even coats | Use a roller for uniform application, allowing each coat to dry before applying the next for best results. |
| 4. Allow sufficient drying time | Ensure the sealed driveway cures undisturbed for 24-48 hours for maximum protection and durability. |
| 5. Perform a final inspection | Check for uniformity and effectiveness post-application to address any issues before regular use of the driveway. |
Step 1: Prepare the Concrete Surface
Successfully sealing a concrete driveway begins with meticulous surface preparation. This critical first step determines how effectively the sealant will protect and enhance your concrete surface. Learn more about professional driveway protection by understanding the importance of thorough preparation.
Starting your concrete driveway sealing project requires gathering the right tools and creating a clean, smooth surface. You will need basic cleaning supplies like a stiff-bristled brush, pressure washer or garden hose, concrete cleaner, protective gloves, safety glasses, and a bucket. Begin by removing all loose debris such as leaves, dirt, and stones using a robust push broom or leaf blower. This initial cleaning prevents small particles from becoming trapped under the sealant.
Next, thoroughly clean the concrete surface using a specialized concrete degreaser or cleaner. Mix the cleaning solution according to manufacturer instructions and apply it generously across the entire driveway. Use a stiff-bristled brush to scrub away oil stains, mildew, and embedded dirt. For particularly stubborn stains, consider using a pressure washer set at a moderate pressure to avoid damaging the concrete surface. Be careful not to create additional surface damage during cleaning.
After cleaning, carefully inspect the concrete for any cracks, chips, or uneven areas. Small surface imperfections can compromise the sealant’s effectiveness and appearance. For minor cracks less than 1/4 inch wide, use a concrete crack filler specifically designed for exterior use. Apply the filler carefully, following the product instructions, and allow it to dry completely. Larger cracks or significant surface damage might require professional repair before sealing.
Once cleaned and repaired, allow the concrete surface to dry completely. This typically takes 24 to 48 hours, depending on weather conditions and humidity levels. The surface should be completely dry, with no moisture visible. A dry surface ensures optimal sealant adhesion and prevents potential issues like bubbling or uneven application.
Use this checklist table to verify your driveway is ready for sealing and to ensure a smooth, high-quality sealant application.
| Preparation Step | What to Check/Do | Completion Verified |
|---|---|---|
| Remove debris | Sweep or blow away all loose dirt, leaves, and stones | |
| Clean with concrete degreaser | Scrub and rinse the surface thoroughly | |
| Repair cracks (if present) | Fill any cracks/chips according to product instructions | |
| Inspect for moisture | Ensure surface is dry with no visible water/moisture | |
| Water droplet test | Confirm water absorbs rapidly (no beading) |
Verify your surface is ready for sealing by performing a simple water droplet test. Sprinkle a few water droplets on different areas of the driveway. If the water beads up and does not absorb quickly, the surface is likely too sealed or contaminated and will require additional cleaning. If water absorbs quickly and leaves no residue, your concrete is prepared and ready for the next step in the sealing process.
Step 2: Choose the Right Sealant
Selecting the appropriate concrete driveway sealant is crucial for long lasting protection and aesthetic appeal. Learn about different sealant types to make an informed decision that matches your specific driveway requirements. Understanding the various sealant options will help you protect your concrete investment effectively.
Concrete sealants come in multiple formulations, each designed for specific environmental conditions and performance needs. Penetrating sealers represent an excellent choice for homeowners seeking durable protection without significantly altering the concrete’s natural appearance. These sealants absorb into the concrete, creating a chemical barrier that prevents moisture penetration and reduces potential damage from freeze thaw cycles.
Acrylics and epoxy based sealants offer a more visible protective layer, providing a glossy finish that enhances the concrete’s color and provides additional surface protection. These sealants create a thin film on the concrete surface, offering excellent resistance against oil stains, water damage, and UV radiation. Homeowners in regions with extreme temperature variations or high moisture levels might find these options particularly beneficial.
When choosing a sealant, consider critical factors like your local climate, the driveway’s current condition, and expected traffic levels. Areas with harsh winters require sealants with superior freeze thaw resistance. Driveways experiencing heavy vehicle traffic need more robust, abrasion resistant products. Sunlight exposure and potential chemical interactions also play significant roles in sealant performance and longevity.
Pay close attention to the specific product characteristics. Look for sealants that offer:
- Water repellent properties
- UV protection
- Stain resistance
- Breathability to prevent moisture trapping
- Compatibility with your specific concrete surface
Budget considerations are important, but avoid selecting a sealant solely based on price. Investing in a high quality sealant can save significant money in long term maintenance and potential concrete repair costs.
Below is a comparison table outlining the main types of concrete driveway sealants discussed, along with their advantages, finish, and recommended usage situations.
| Sealant Type | Appearance/Finish | Key Advantages | Recommended For |
|---|---|---|---|
| Penetrating Sealer | Natural, unchanged look | Moisture resistance, freeze-thaw protection | Areas with harsh winters, those preferring a natural look |
| Acrylic Sealer | Glossy surface, enhances color | UV/stain resistance, easy application | Driveways needing extra surface protection/place with high sunlight |
| Epoxy Sealer | Durable, glossy film | Abrasion resistance, chemical protection | High-traffic areas or driveways exposed to oil/chemicals |
| Read product labels carefully, checking for manufacturer warranties and recommended application techniques. Some premium sealants offer extended protection periods of up to 10 years with a single application, representing excellent long term value for homeowners. |
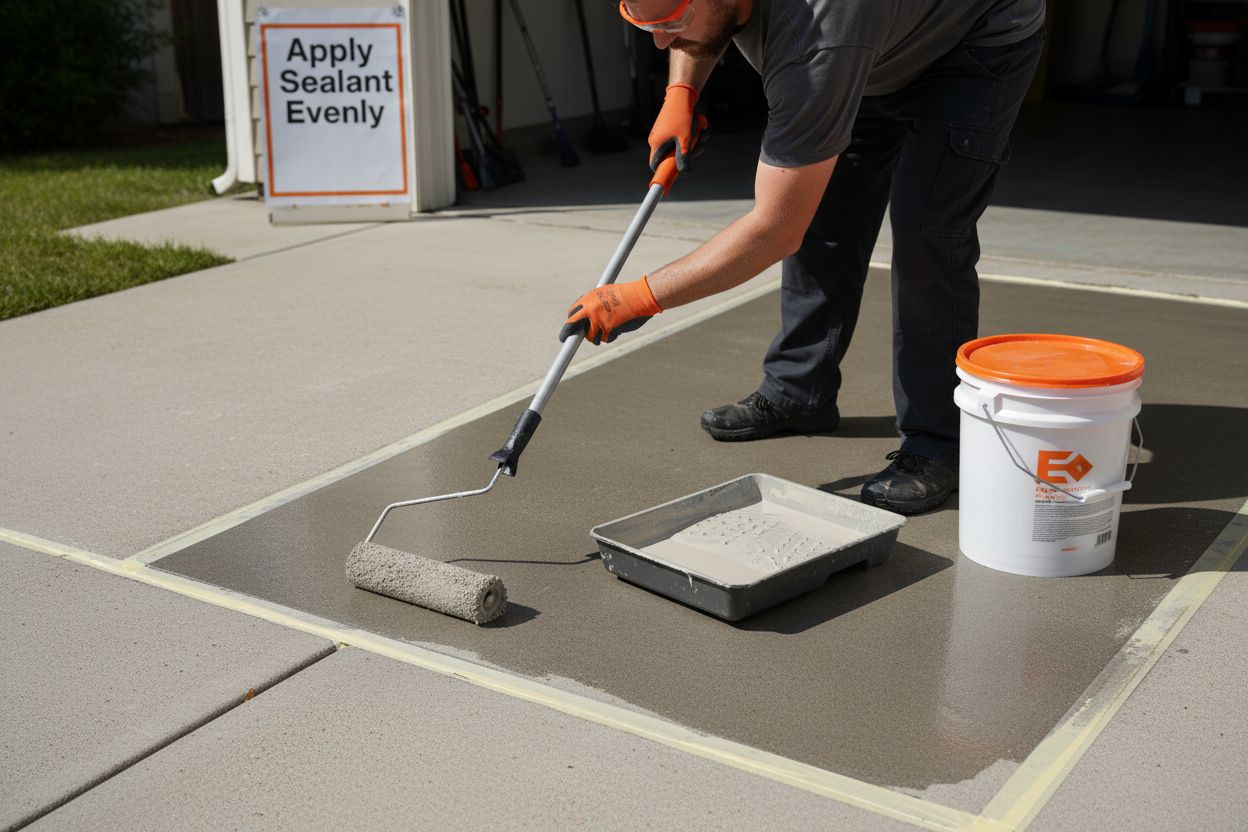
Step 3: Apply the Sealant Evenly
Applying sealant evenly is a critical phase that determines the effectiveness and aesthetic quality of your concrete driveway protection. Understand sealant application techniques to achieve professional results and maximize your driveway’s longevity.
Before starting, gather essential tools including a paint roller with an extension pole, paint tray, paintbrush for edges, protective gloves, safety glasses, and a lint free cloth. Choose a roller with a medium nap thickness appropriate for concrete surfaces. Weather conditions play a crucial role in successful application temperatures should be between 50 and 80 degrees Fahrenheit with no rain forecast for at least 24 hours.
Begin the application process by dividing your driveway into manageable sections. Start at the furthest point from your main entrance and work systematically towards the exit. This approach prevents accidentally sealing yourself into a corner and ensures complete coverage. Pour a modest amount of sealant into your paint tray, avoiding overfilling which can lead to wastage and uneven application.
Using a paint roller with smooth, consistent strokes, apply the sealant in thin, even layers. Do not oversaturate the surface as this can cause pooling, bubbling, and an uneven finish. Move the roller in a single direction maintaining a wet edge to prevent lap marks. For areas near walls, garage entrances, or tight corners, use a paintbrush to ensure precise application. Work methodically and maintain a steady, controlled pace.
Expect to apply two thin coats rather than one thick coat. Allow the first layer to dry completely according to manufacturer instructions typically between two to four hours before applying the second coat. Always apply the second coat in a perpendicular direction to the first application to ensure complete and uniform coverage. This cross rolling technique helps eliminate potential missed spots and creates a more consistent protective layer.
Verify your application quality by checking for these key indicators:
- No visible pooling or puddling of sealant
- Uniform color and sheen across the entire surface
- No visible roller or brush marks
- Complete coverage with no missed patches
After application, allow the sealed surface to cure completely before resuming normal use. Avoid walking or driving on the newly sealed surface for at least 24 to 48 hours depending on temperature and humidity levels. Proper curing ensures maximum protection and durability of your concrete driveway’s new protective layer.
Step 4: Allow Sufficient Drying Time
Drying time is a critical yet often overlooked phase in the concrete driveway sealing process. Learn about proper curing techniques to ensure your driveway receives maximum protection and achieves optimal performance. Patience during this stage directly impacts the longevity and effectiveness of your sealant application.
Understanding the nuanced requirements of drying time depends on multiple environmental factors. Temperature, humidity, and the specific type of sealant you have chosen will significantly influence the curing process. Generally, most concrete sealants require a minimum of 24 to 48 hours of undisturbed curing time. However, this timeline can fluctuate based on specific product recommendations and local weather conditions.
Temperature plays a crucial role in the drying process. Ideal sealing conditions typically range between 50 and 80 degrees Fahrenheit with low humidity. Cooler temperatures and higher humidity levels will extend drying time, potentially requiring up to 72 hours for complete curing. Direct sunlight can accelerate drying, but excessive heat might cause rapid evaporation and compromise the sealant’s protective properties. Plan your sealing project during mild weather windows to optimize the curing process.
During the drying period, absolutely avoid any traffic on the sealed surface. This means no walking, driving, or placing any objects on the newly sealed driveway. Vehicular traffic can create permanent impressions or damage the delicate drying sealant layer. If you must cross the area, use wooden planks or temporary walkways to distribute weight and prevent direct contact with the fresh sealant.
Monitor the drying process carefully by observing these key indicators:
- Surface appears uniformly colored and glossy
- No tackiness or soft spots when gently touched
- No visible moisture or wet areas
- Sealant looks consistent and smooth across the entire surface
Pay special attention to areas with potential moisture exposure or shade.
These regions might require additional drying time. Regions near trees, buildings, or with limited sunlight exposure could retain moisture longer, potentially extending the curing process. Use a small fan or dehumidifier to improve air circulation and expedite drying in challenging areas.
Once the recommended drying time has passed, perform a final inspection before resuming normal driveway use. Gently test the surface with your hand to ensure complete dryness. If the sealant feels firm and shows no signs of softness or discoloration, you can gradually reintroduce normal traffic. For the first week after sealing, consider limiting heavy vehicle traffic and avoiding harsh cleaning methods to allow the sealant to fully cure and develop its protective properties.
Step 5: Perform a Final Inspection
The final inspection is your opportunity to ensure that your concrete driveway sealing project has been completed successfully and will provide long lasting protection. Discover professional inspection techniques to validate the quality of your hard work and identify any potential issues before they become significant problems.
Begin your comprehensive inspection during daylight hours, preferably on a day with moderate temperature and good natural lighting. This will help you detect subtle variations in color, texture, and coverage that might be missed under different lighting conditions. Walk the entire surface systematically, examining each section carefully from multiple angles. Use both direct and oblique lighting to reveal any imperfections that might not be immediately apparent.
Carefully examine the sealed surface for several key indicators of proper application. Look for uniform color and sheen across the entire driveway, which signals consistent sealant coverage. Check for any areas with pooling, streaking, or uneven application that might compromise the protective layer. Pay special attention to edges, corners, and areas near structures where roller or brush application might have been challenging.
Test the sealant’s effectiveness by performing a water droplet test. Sprinkle small amounts of water in different areas of the driveway and observe how it behaves. Properly sealed concrete will display water beading on the surface without immediate absorption. If water quickly penetrates the surface or leaves dark spots, this might indicate insufficient or uneven sealing that requires additional attention.
Look for these critical signs during your final inspection:
- Consistent glossy or matte finish (depending on sealant type)
- No visible roller or brush marks
- Smooth, even surface without bubbles or divots
- Clear water beading when tested
- No discoloration or uneven patches
Pay particular attention to potential problem areas such as expansion joints, areas near garage entrances, or sections exposed to consistent shade or moisture. These locations are more susceptible to sealing inconsistencies and may require additional spot treatment. Use a bright flashlight to illuminate these areas thoroughly, helping you detect subtle variations that might be missed during casual observation.
If you discover any imperfections during your inspection, do not panic. Minor issues can often be addressed by applying a thin, additional coat of sealant to problematic areas. However, significant inconsistencies might require completely resealing the surface. Document any problems with photographs, which can help you track changes over time and provide a reference if you need professional consultation. Remember that a thorough final inspection ensures your driveway receives maximum protection and maintains its aesthetic appeal for years to come.
Seal Your Driveway with Confidence—Protect and Enhance Today
If you are worried about cracks, stains or weather taking a toll on your concrete driveway, you are not alone. As the article explains, surface preparation, sealant selection and correct application are the keys to long lasting protection. But even with the right steps, using the wrong product or missing a detail can mean costly repairs down the road. Give your home the strong shield it deserves.
Explore our best concrete sealers for driveways and patios and find advanced formulas designed for real homeowner needs. Every solution is tested to reduce water penetration, resist stains, and defend against UV damage. You do not need to settle for short term fixes or generic products. Get reliable performance and peace of mind with the innovations that set us apart.
Ready to protect your investment after reading these proven steps? Visit https://shinykings.com for our full line of exclusive sealants or choose from the long-lasting driveway sealers trusted by homeowners. Act now to keep your concrete driveway looking new and strong for years.
Frequently Asked Questions
How do I prepare the concrete surface before sealing?
To prepare the concrete surface, remove loose debris with a broom or leaf blower, clean the surface with a concrete degreaser or cleaner, inspect for cracks, fill minor cracks with concrete crack filler, and ensure the surface is completely dry before sealing.
What type of sealant should I use for my concrete driveway?
Choose a sealant based on your driveway’s condition and environmental factors. Penetrating sealers provide durable protection without altering appearance, while acrylics and epoxies offer a glossy finish and surface-level protection. Consider your local climate and driveway traffic to decide on the best option.
How long should I wait for the sealant to dry before using my driveway?
Most concrete sealants require 24 to 48 hours of curing time before resuming use. However, this can vary depending on the specific sealant, temperature, and humidity conditions. It’s essential to ensure that the surface feels firm and shows no signs of moisture before using it.
What can I do if I notice imperfections after sealing my driveway?
If you find imperfections such as uneven areas or insufficient sealing, you can apply a thin additional coat of sealant to the problematic spots. For significant issues, resealing the entire surface may be necessary. Document any problems for future reference.
Recommended
- How to Seal Your Driveway Like a Pro | Shinykings – shinykingsinc
- What is the best concrete Sealer to seal your driveway? Explained – shinykingsinc
- Concrete Sealer: My 2-Year Journey Protecting My Patio – shinykingsinc
- Nanoprotect Concrete & Stone Sealer | Long Lasting Driveway, Patio & P – shinykingsinc