


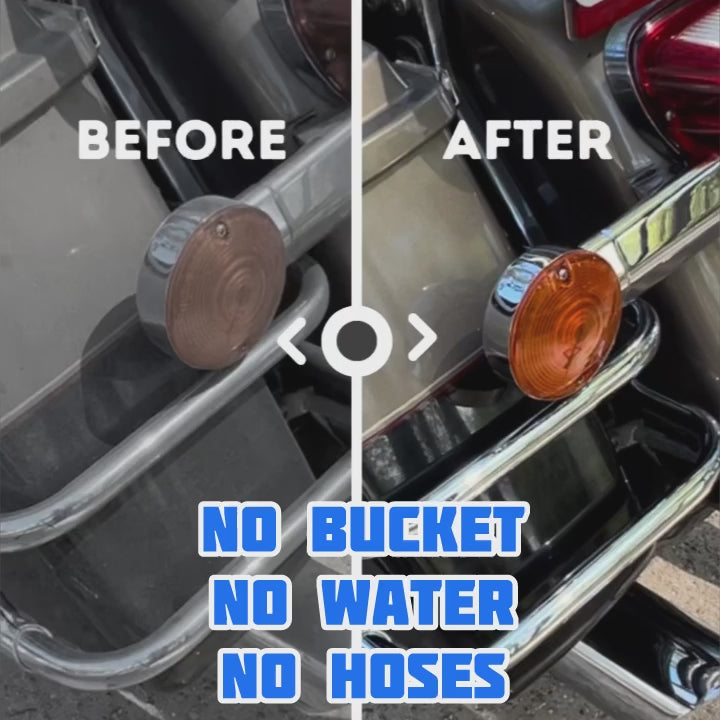
How to Clean Car Windows Naturally: Clear Vision Ahead
Cleaning your car windows sounds simple but it can turn into a streaky mess faster than you expect. Most people grab any old towel and a bottle of cleaner, thinking it will do the trick. Yet studies show that using distilled white vinegar with at least 5 percent acidity dissolves grime far better than ordinary window sprays and keeps surfaces free of chemical residue. Turns out the right technique and a few natural materials can leave car windows cleaner than anything you can buy in a store.
Table of Contents
- Step 1: Gather Your Cleaning Materials And Tools
- Step 2: Prepare The Car For Cleaning Action
- Step 3: Apply Cleaning Solution To The Windows
- Step 4: Wipe Down The Windows With A Microfiber Cloth
- Step 5: Inspect The Windows For Streaks And Residues
- Step 6: Finalize And Polish The Windows For Clarity
Quick Summary
| Key Point | Explanation |
|---|---|
| 1. Gather essential cleaning materials | Use distilled white vinegar, microfiber towels, and cotton cloths to ensure effective and natural cleaning. |
| 2. Prepare your car and workspace | Choose a shaded location and remove all debris to create an optimal cleaning environment for better results. |
| 3. Apply cleaning solution properly | Use a mix of vinegar and water on a cloth to control application and avoid streaks when cleaning windows. |
| 4. Employ effective wiping techniques | Wipe in systematic patterns with a microfiber cloth to ensure streak-free clarity and address corners and edges. |
| 5. Inspect and polish for perfection | Check for streaks in natural light and finalize with gentle buffing for clarity and a professional appearance. |
Step 1: Gather your cleaning materials and tools
Preparing to clean your car windows naturally starts with assembling the right materials. Effective window cleaning requires more than just grabbing a random cloth and hoping for the best. You will need specific tools that help you achieve streak free and crystal clear results without using harsh chemical cleaners.
Essential Materials for Natural Window Cleaning
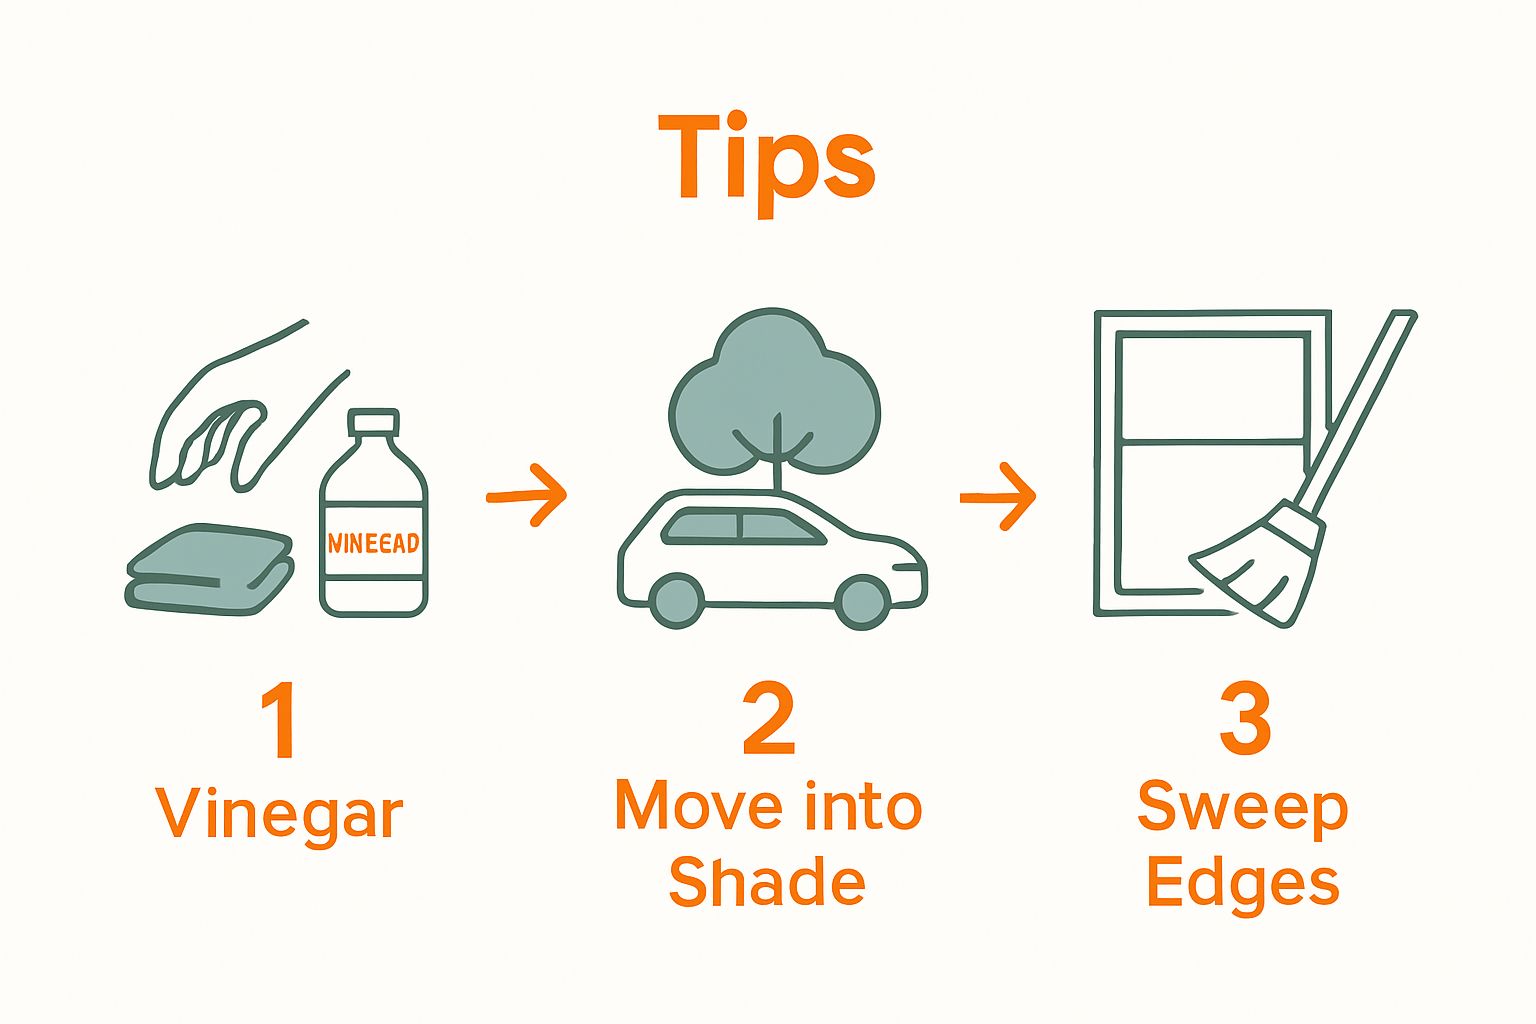
Begin by collecting a few key items that will transform your car window cleaning experience. White vinegar serves as the primary natural cleaning solution due to its powerful degreasing and disinfecting properties. You will want to select a distilled white vinegar with at least 5% acidity for optimal cleaning performance. Alongside vinegar, gather some microfiber towels which are crucial for preventing scratches and leaving a lint free finish.
Your tool collection should include soft cotton cloths or specialized glass cleaning microfiber towels, preferably with a tight weave to trap dirt effectively. Opt for clean cloths that have not been previously used with other cleaning products to prevent potential chemical interactions. A spray bottle will help you distribute your homemade cleaning solution evenly across window surfaces.
Consider our guide on waterless cleaning techniques for additional insights into efficient car maintenance. Some additional recommended tools include a squeegee with a soft rubber edge for final polishing, clean water for rinsing, and newspaper or coffee filters as alternative drying materials that can provide an exceptional shine.
Preparing your workspace is equally important. Choose a shaded area to prevent cleaning solutions from drying too quickly, which can cause streaking. Have multiple clean microfiber towels ready - one for applying solution, another for wiping, and a third for final buffing. By gathering these materials thoughtfully, you set the stage for achieving professional grade window cleaning results using completely natural methods.
Here is a summary table of the essential natural cleaning materials and tools, including their purposes, to help you prepare everything you need for effective car window cleaning.
| Material/Tool | Specification/Type | Purpose |
|---|---|---|
| Distilled White Vinegar | At least 5% acidity | Main cleaning agent, dissolves grime |
| Microfiber Towels | Tight weave, high quality | Wiping and polishing, prevents streaks |
| Cotton Cloths | Clean, unused | Application and drying |
| Spray Bottle | Clean, plastic | Evenly distributes cleaning solution |
| Squeegee | Soft rubber edge | Final polishing and drying |
| Clean Water | Preferably distilled | Rinsing, final wipe |
| Newspaper/Coffee Filters | Lint-free | Alternative drying for extra shine |
Step 2: Prepare the car for cleaning action
Before diving into window cleaning, proper preparation is crucial to ensure a smooth and effective process. Preparing your car creates an optimal environment for achieving pristine windows without causing unintended damage. This step involves strategic positioning, initial surface assessment, and creating the right workspace for your natural cleaning approach.
Start by selecting an appropriate location for your window cleaning project. Avoid direct sunlight as it can cause cleaning solutions to dry too quickly, leading to stubborn streaks and water spots. Choose a shaded area like a covered parking space or a spot under a tree during moderate temperature conditions. The ideal cleaning environment will be cool and out of direct wind to prevent rapid solution evaporation.
Remove all personal items and loose debris from inside the vehicle, paying special attention to the dashboard and window sills. Check out our waterless car wash kit for comprehensive cleaning tools that can help with this preparation stage. Use a soft brush or microfiber cloth to gently sweep away dust and particles from window edges and surrounding surfaces. This initial cleaning prevents potential scratching during the main window cleaning process.
Inspect your car windows carefully for existing damage like small chips, cracks, or particularly stubborn areas of buildup. Minor imperfections might require extra attention or specialized treatment. Roll down windows slightly to access and clean the top edges where grime often accumulates but is typically missed during standard washing. By methodically preparing your workspace and windows, you set the foundation for achieving crystal clear, naturally cleaned car windows that will enhance both visibility and vehicle appearance.
Step 3: Apply cleaning solution to the windows
Applying the natural cleaning solution is a critical phase in achieving spotless car windows. Your goal during this step is to distribute the solution evenly and effectively, minimizing streaks and maximizing cleaning power. The technique you use will significantly impact the final result of your window cleaning process.
Prepare your homemade natural cleaning solution by mixing equal parts distilled white vinegar and water in your spray bottle. This simple yet powerful mixture cuts through grease, dust, and grime without leaving harmful chemical residues. Shake the bottle gently to ensure thorough mixing, creating a uniform cleaning agent that will work consistently across all window surfaces.
Begin by targeting the exterior windows first, which typically accumulate more environmental contaminants like dirt, dust, and road grime. Learn more about deep cleaning techniques to enhance your overall cleaning approach. Spray the solution directly onto a clean microfiber cloth rather than spraying onto the window surface. This method provides better control and prevents excess liquid from dripping down the car’s paintwork. Work in small, manageable sections to ensure thorough coverage and prevent the solution from drying before you can wipe it away.
Apply the solution using circular motions, which help break down stubborn dirt and prevent linear streaking. Use moderate pressure and overlap your cleaning strokes to guarantee complete coverage. For windows with heavy buildup, you might need to apply the solution multiple times, allowing each application to sit for a brief moment before wiping. Pay extra attention to corners and edges where grime tends to accumulate. By methodically working through each window section, you create a systematic approach that ensures no spot is left untouched, setting the stage for crystal clear, naturally cleaned car windows.
This table provides an overview of each step in the natural car window cleaning process, including the main goal and brief summary to guide you through the workflow.
| Step Number | Step Name | Main Goal | Summary |
|---|---|---|---|
| 1 | Gather Materials and Tools | Prepare all cleaning supplies | Collect natural cleaners, cloths, and essential tools |
| 2 | Prepare Car and Workspace | Ready car and ensure ideal conditions | Choose shaded spot, remove debris, assess window state |
| 3 | Apply Cleaning Solution | Even coverage of cleaning mixture | Use vinegar-water mix, apply with microfiber cloth |
| 4 | Wipe with Microfiber Cloth | Remove dirt and cleaning solution | Wipe systematically, use proper strokes for clarity |
| 5 | Inspect for Streaks and Residues | Ensure streak-free, clear windows | Check under natural light, buff out any imperfections |
| 6 | Finalize and Polish | Create sparkling and protected finish | Buff gently and apply optional rubbing alcohol for shine |
Step 4: Wipe down the windows with a microfiber cloth
Wiping down car windows requires precision, technique, and the right tools to achieve a streak free, crystal clear finish. This step transforms your cleaning solution application into a professional grade window treatment that will dramatically improve visibility and vehicle appearance.
Microfiber Cloth Technique is crucial for preventing scratches and ensuring optimal cleaning results. Select a high quality microfiber cloth with a tight weave and minimal texture. Hold the cloth firmly but not rigidly, allowing smooth gliding motions across the glass surface. Always start with a clean, dry section of the cloth to avoid redistributing dirt or creating unnecessary streaks.
Learn about our professional cleaning techniques for additional insights into maintaining pristine surfaces. Begin wiping in a systematic pattern - typically starting from the top of the window and moving downward in overlapping horizontal or vertical strokes. This approach ensures complete coverage and prevents solution from dripping onto already cleaned areas. For interior windows, use vertical strokes on one side and horizontal strokes on the opposite side. This technique helps you quickly identify and eliminate any remaining streaks.
Pay special attention to window edges and corners where grime tends to accumulate. Use the folded edge of your microfiber cloth or a clean section to address these tricky areas. Rotate and refold your cloth frequently to always work with a clean surface. If you notice persistent streaks, slightly dampen a fresh microfiber cloth with clean water and do a final gentle wipe. The goal is a crystal clear window that looks professionally detailed, with no visible residue or cleaning marks. By following these precise wiping techniques, you transform a simple cleaning task into an art form that leaves your car windows sparkling and transparent.
Step 5: Inspect the windows for streaks and residues
Inspecting your car windows after cleaning is a critical final step that separates amateur cleaning attempts from professional results. This phase requires careful examination under different lighting conditions to ensure your natural cleaning method has truly delivered streak free, crystal clear windows that provide optimal visibility.
Lighting is Everything when it comes to detecting imperfections. Choose multiple inspection locations to reveal hidden streaks and residues. Natural daylight works best, but avoid direct sunlight which can mask subtle cleaning issues. Move around the vehicle, examining windows from different angles - standing close, stepping back, and even checking interior and exterior surfaces. Tilt your head and look across the glass surface at a slight angle, which helps reveal any remaining streaks or missed spots that might be invisible during direct observation.
Learn more about deep cleaning techniques to refine your window maintenance skills. If you discover remaining streaks, resist the urge to apply more cleaning solution immediately. Instead, take a clean, dry microfiber cloth and gently buff the problematic areas using circular motions. This technique often eliminates light streaking without rewetting the entire surface. For stubborn residues, create a fresh solution and carefully reapply using the techniques from previous steps.
Pay special attention to window edges and corners, where cleaning solution can sometimes leave subtle marks. Use the corner of a clean microfiber cloth to address these areas precisely. Your goal is windows so clean that they appear invisible - no water spots, no streaks, no residual film. By methodically inspecting and addressing any imperfections, you transform a simple cleaning task into a professional detailing experience that dramatically enhances your vehicle’s appearance and driving visibility.
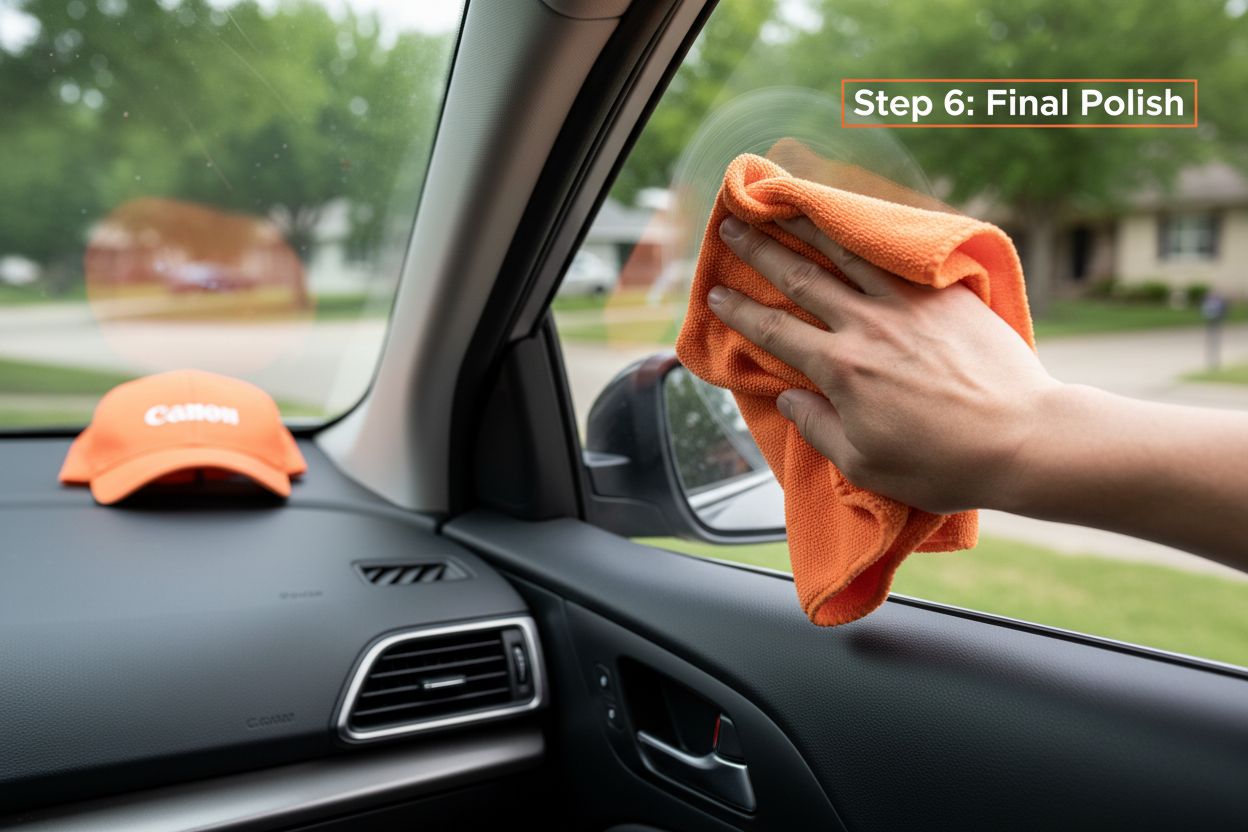
Step 6: Finalize and polish the windows for clarity
The final polishing stage transforms your car window cleaning from a basic maintenance task into a professional detailing experience. This critical step enhances transparency, removes microscopic residues, and creates a protective barrier that helps repel future dirt and grime accumulation. Proper polishing not only improves visibility but also contributes to the overall aesthetic appeal of your vehicle.
Buffing Technique Matters significantly in achieving that crystal clear finish. Select a clean, dry microfiber cloth with an ultra soft texture - preferably one specifically designed for glass surfaces. Hold the cloth taut and use gentle, consistent circular motions across the entire window surface. Apply minimal pressure, allowing the cloth’s fine fibers to lift any remaining microscopic particles. Work systematically from top to bottom, rotating the cloth frequently to ensure you are always using a clean section.
Explore our professional cleaning techniques for additional insights into maintaining pristine surfaces. For an extra layer of protection, consider using a small amount of rubbing alcohol on a clean microfiber cloth for a final pass. This helps eliminate any lingering film and creates a water repellent surface that enhances future cleaning efforts. Pay special attention to window edges and corners, using the cloth’s corner to address these detail oriented areas.
The ultimate test of your polishing success is natural light inspection. Step back and view the windows from multiple angles, checking for absolute clarity and transparency. Your windows should appear completely invisible, with no visible streaks, residues, or cleaning marks. By dedicating time to this meticulous final step, you elevate your car window cleaning from a routine task to a professional level of detailing that showcases your commitment to vehicle maintenance and aesthetic excellence.
Achieve a Crystal Clear Drive—Naturally
Are you tired of fighting endless streaks and persistent grime when cleaning your car windows? Following natural cleaning steps can leave windows sparkling, but even the best homemade efforts sometimes fall short of true professional results. Achieving truly streak free, long lasting clarity can feel out of reach, especially when battling stubborn buildup or residue that returns after every wash. Imagine driving with windows so pristine that visibility is never compromised and your car always looks its best.
Discover the difference with specialized solutions from ShinyKings. Explore our Bestsellers at Shinykings.com, where innovative glass coatings and advanced carwash products go beyond simple cleaning to offer invisible protection and easier maintenance.

Upgrade your approach and experience next level results. Visit ShinyKings.com today to find products designed for ultimate clarity and effortless upkeep. Tackle lingering streaks, resist grime buildup, and polish every detail to perfection. Take the step now for uncompromising visibility and confidence behind the wheel.
Frequently Asked Questions
How do I make a natural cleaning solution for my car windows?
To create a natural cleaning solution, mix equal parts distilled white vinegar and water in a spray bottle. This effective mixture cuts through grease and grime without harmful chemicals.
What type of cloth should I use to clean my car windows?
Use high-quality microfiber towels for cleaning car windows. They are designed to prevent scratches and leave a lint-free finish, ensuring optimal cleaning results.
How can I avoid streaks when cleaning my windows?
To avoid streaks, apply the cleaning solution to a microfiber cloth instead of the window surface. Wipe using circular motions and make sure to work in small sections, ensuring the solution does not dry before wiping it away.
What should I do if I find streaks after cleaning my windows?
If you notice streaks after cleaning, use a clean, dry microfiber cloth to buff the affected areas gently. If streaks persist, lightly dampen a fresh cloth with clean water and perform a gentle final wipe.
Recommended
- What is Glass Coating? Understanding Its Importance – shinykingsinc
- Carwash Shampoo waterless - Wash&Shine 66 1.32 GAL – shinykingsinc
- Best waterless car wash - Wash&Shine 66 cleaning kit XXL 1.45 gal + 4 FREE towels. – shinykingsinc
- What is Clear Coat? Understanding Its Importance and Use – shinykingsinc