


How to Remove Car Stains: A Step-by-Step Guide
Stains on your car can be more frustrating than a flat tire, and almost 70 percent of car owners admit they’ve struggled to remove spots like bird droppings or tree sap. Most people rush to scrub away the mess, only to find streaks, damage, or stubborn stains that just will not budge. The real secret is that the type of stain matters more than how hard you scrub, and knowing the exact culprit puts you miles ahead when it comes to keeping your ride spotless.
Table of Contents
- Step 1: Evaluate The Stain Type On Your Car
- Step 2: Gather Necessary Cleaning Supplies
- Step 3: Prepare The Affected Area For Cleaning
- Step 4: Apply The Appropriate Cleaning Solution
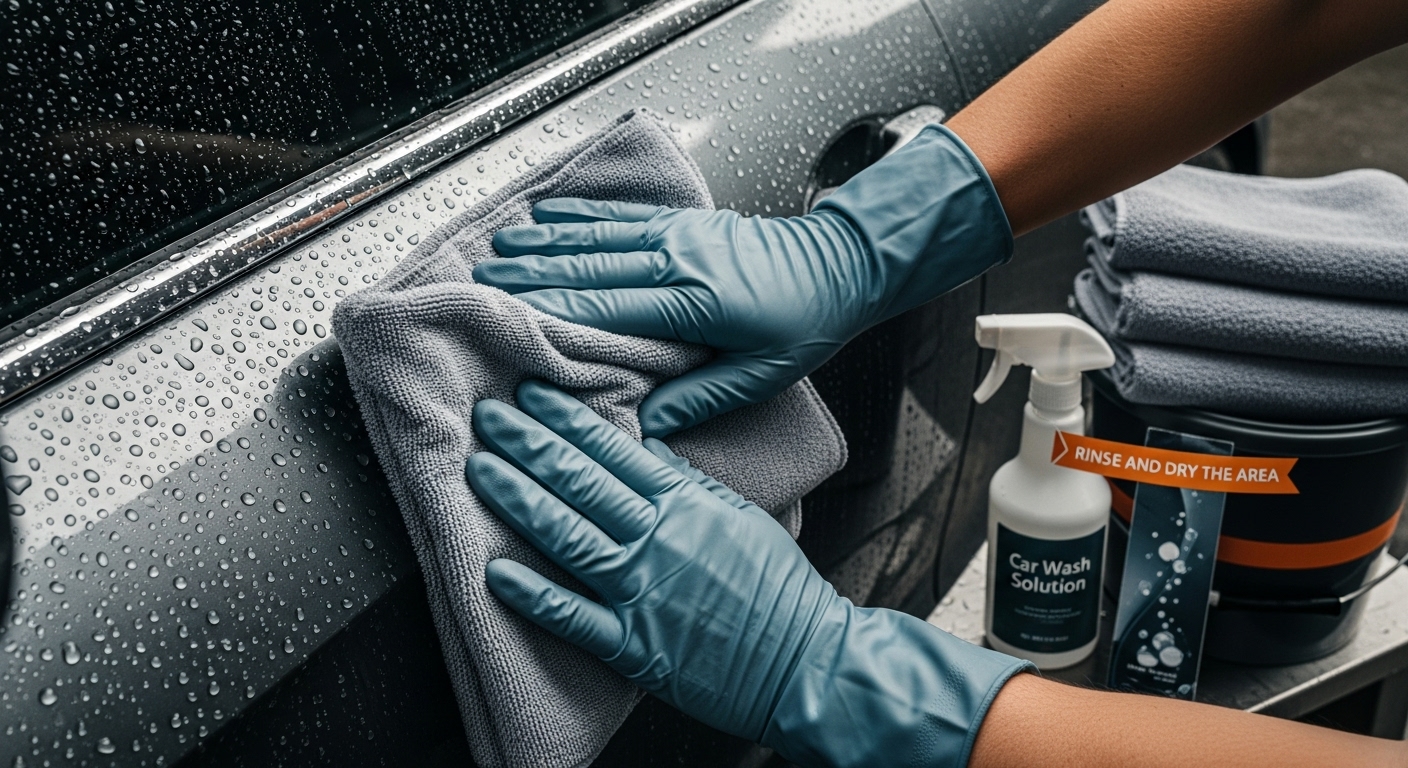
- Step 5: Rinse And Dry The Area Thoroughly
- Step 6: Inspect For Remaining Stains And Repeat If Necessary
Quick Summary
| Key Point | Explanation |
|---|---|
| 1. Identify the stain type | Properly assess the stain’s color and texture to determine the best cleaning method and prevent damage. |
| 2. Gather appropriate supplies | Prepare a cleaning kit with microfiber towels and tailored cleaning solutions for each type of stain. |
| 3. Prepare the area properly | Rinse the stained surface with lukewarm water and park in the shade to avoid fast-drying cleaning solutions. |
| 4. Apply cleaning solution carefully | Use microfiber cloths to control the cleaning agent and apply it in gentle circular motions for effective stain removal. |
| 5. Inspect and repeat if needed | Check the cleaned area for any remaining stains and be ready to repeat the cleaning process if necessary. |
Step 1: Evaluate the Stain Type on Your Car
Before diving into stain removal, understanding what type of stain has landed on your car’s surface is crucial. Different substances require specific treatment approaches, and mishandling can potentially cause more damage than the original stain itself. Your first mission is to carefully identify the exact nature of the stain by closely observing its color, texture, and location.
Begin by examining the stain closely. Is it an oil-based substance like motor oil or grease? A water-based liquid like coffee or soda? Perhaps an organic material like bird droppings or tree sap? Each category demands a unique removal strategy. For instance, organic stains typically require enzyme-based cleaners, while oil-based substances need degreasing agents. Color and consistency are your primary investigative tools.
Careful visual inspection combined with gentle touch can reveal significant information. Dark, greasy stains likely indicate automotive fluids or mechanical residues, while lighter, sticky substances might suggest tree sap or insect remnants. When in doubt, take a photograph or make a detailed note of the stain’s characteristics before attempting any removal. This documentation can help you select the most appropriate cleaning method and prevent potential surface damage.
If you’re uncertain about a specific stain type, check out our guide on vehicle maintenance for additional insights. Professional detailers often recommend a systematic approach: observe, document, and then select a targeted cleaning solution that matches the stain’s specific composition.
 Remember, patience and careful assessment are your best tools in this initial evaluation stage.
Step 2: Gather Necessary Cleaning Supplies
Arming yourself with the right cleaning supplies is like preparing for a strategic mission against stubborn car stains. Your success depends on selecting appropriate tools and solutions that match the specific challenge you are facing. Professional detailers understand that having the correct equipment makes all the difference between a pristine finish and a potential surface disaster.
First, assemble a comprehensive cleaning kit that includes microfiber towels, which are gentle yet highly effective for most surfaces. Microfiber prevents scratching while effectively lifting and trapping dirt particles. You will want multiple towels to prevent cross-contamination between different cleaning stages. Select towels with varying textures – some for initial cleaning, others for final buffing and delicate work.
Next, collect specialized cleaning solutions tailored to different stain types. Water-based stain removers work well for organic substances, while solvent-based solutions tackle oil and grease effectively. Learn more about deep cleaning techniques that can complement your stain removal process. Essential items should include a pH-neutral car wash soap, specialized stain remover, rubbing alcohol, white vinegar, and a gentle degreasing agent. Pro tip: Always test any cleaning solution on a small, inconspicuous area first to ensure it does not damage your car’s paint or finish.
Complete your kit with precision tools like soft-bristled brushes for detailed work, disposable gloves to protect your hands, and clean water for rinsing. Having everything organized and within reach before starting will make your stain removal process smoother and more efficient.
Below is a table summarizing key cleaning supplies, their main purpose, and usage notes to help you prepare an effective car stain removal kit.
| Item | Purpose | Usage Notes |
|---|---|---|
| Microfiber towels | Gently lift and trap dirt | Use different towels for each cleaning stage |
| pH-neutral car wash soap | Safe routine cleaning | Prevents damage to paint and finishes |
| Specialized stain remover | Treats tough or specific stains | Select based on stain type; test on small area first |
| Rubbing alcohol | Removes certain organic or adhesive stains | Apply gently with microfiber; avoid overuse |
| White vinegar | Breaks down mineral or water stains | Dilute and use with care on painted surfaces |
| Gentle degreasing agent | Cuts through oil and grease | Essential for oil-based stain removal |
| Soft-bristled brush | Assists with detailed cleaning | Use on textured surfaces with care |
| Disposable gloves | Protects your hands | Ideal when using chemicals or strong cleaners |
| Clean water | Rinses away dirt and cleaning agents | Lukewarm water is best for initial rinsing |
Step 3: Prepare the Affected Area for Cleaning
Preparing the affected area is a critical phase that can make or break your entire stain removal process. Proper preparation prevents potential damage and ensures more effective cleaning. Think of this step as creating a clean canvas before applying your restoration techniques. Surface preparation is not just about removing the stain but protecting your car’s delicate paint and finish during the cleaning process.
Begin by parking your vehicle in a shaded area with consistent temperature. Direct sunlight can cause cleaning solutions to dry too quickly, potentially leaving residue or causing uneven cleaning. Use clean water to gently rinse the stained area, removing loose dirt and debris that could scratch the surface during cleaning. Soft, lukewarm water works best for initial surface preparation. Avoid using high-pressure water streams, which might drive contaminants deeper into the paint or cause additional damage.
Carefully inspect the surrounding area around the stain. Look for any existing paint damage, scratches, or sensitive areas that might require extra caution. Some stains might have already started to interact with the car’s surface, potentially creating more complex cleaning challenges. Use a soft, lint-free microfiber cloth to gently pat the area dry after rinsing. Check out our comprehensive cleaning techniques to understand the nuanced approach required for different surface conditions. By taking time to thoroughly prepare the surface, you’re setting the stage for a successful stain removal process that will help maintain your vehicle’s pristine appearance and protect its long-term value. Remember, patience and careful preparation are your strongest allies in automotive surface care.
This table provides an overview of each main step in the car stain removal process, highlighting the goal and the main action involved for quick reference.
| Step | Goal | Main Action |
|---|---|---|
| 1. Evaluate the stain type | Identify stain to choose proper method | Visually inspect and note characteristics |
| 2. Gather necessary cleaning supplies | Acquire tools and solutions | Assemble kit with appropriate items |
| 3. Prepare the affected area | Prevent surface damage | Rinse and dry area; park in the shade |
| 4. Apply cleaning solution | Remove stain without harming paint | Apply solution with microfiber; gentle motion |
| 5. Rinse and dry thoroughly | Eliminate residue and avoid water spots | Rinse with lukewarm water; pat dry |
| 6. Inspect and repeat if needed | Ensure stain is fully removed | Check under different lights; repeat process |
Step 4: Apply the Appropriate Cleaning Solution
Applying the right cleaning solution is a delicate art that requires precision, patience, and understanding of your specific stain’s composition. The wrong approach can transform a simple stain removal task into a potential paint repair nightmare. Your goal is to neutralize the stain while preserving your car’s pristine finish.
Start by selecting a cleaning solution that matches the stain type you identified earlier. For organic stains like bird droppings or tree sap, use a specialized enzyme-based cleaner that breaks down protein and plant-based residues. Oil-based stains demand a degreasing agent that can penetrate and lift the contaminant without damaging the underlying paint. Always apply the solution to your microfiber cloth first, not directly onto the car’s surface. This technique provides better control and prevents oversaturation, which could potentially spread the stain or damage the paint.
Work the cleaning solution into the stained area using gentle, circular motions. Apply minimal pressure and allow the product’s chemical properties to do the heavy lifting. Start from the outer edges of the stain and move inward, which helps prevent spreading the contaminant across a larger surface area. Explore our professional car wash solutions for additional insights into effective cleaning techniques. After applying the solution, let it sit for the manufacturer’s recommended duration – typically between 30 seconds to two minutes. This dwell time allows the cleaning agents to effectively break down the stain without risking surface damage.
Remember, patience is your greatest ally in achieving a spotless, professional-grade finish.
Step 5: Rinse and Dry the Area Thoroughly
Rinsing and drying might seem like simple steps, but they are crucial in preventing potential recontamination and ensuring a spotless finish. Improper rinsing can leave behind chemical residues that might damage your car’s paint or attract more dirt. This stage is your final opportunity to ensure a pristine surface that looks as good as new.
Begin the rinsing process with lukewarm water, using a gentle stream that allows you to wash away cleaning solution residues without creating excessive pressure. Avoid high-pressure water streams that could potentially drive contaminants deeper into the paint or cause micro-scratches. Move the water stream consistently across the cleaned area, ensuring all cleaning solution is completely removed. Pay special attention to edges and crevices where cleaning agents might accumulate. Use a clean microfiber towel to guide the water flow and catch any remaining solution, preventing potential streaking or water spot formation.
Drying requires equal precision and care. Explore our professional detailing techniques for additional insights into proper surface maintenance. Select a high-quality, lint-free microfiber towel that can absorb moisture without leaving behind fibers or creating additional surface marks. Use a patting motion rather than a rubbing technique, which helps prevent potential scratching. Work from the center of the cleaned area outward, using minimal pressure and rotating to a clean section of the towel frequently. The goal is to create a completely dry, streak-free surface that reflects your meticulous cleaning effort.
 A perfect dry means no water droplets, no residual cleaning solution, and a surface that looks uniformly clean and protected.
Step 6: Inspect for Remaining Stains and Repeat if Necessary
Careful inspection is the hallmark of a professional-level stain removal process. Not all stains surrender after a single treatment, and rushing to conclude your cleaning effort could leave unsightly remnants that diminish your car’s appearance. Take your time examining the previously stained area under different lighting conditions to ensure complete removal.
Begin your inspection by viewing the surface from multiple angles and light sources. Natural daylight provides the most revealing perspective, helping you detect subtle color variations or lingering stain traces that might have been missed during initial cleaning. Use a clean, dry microfiber towel to gently buff the area, which can help reveal any remaining contaminants. If you notice any persistent discoloration or residue, prepare to repeat your cleaning process using a slightly more aggressive approach. This might involve adjusting your cleaning solution strength or allowing a longer dwell time for the cleaning agent to work effectively.
Learn more about advanced cleaning techniques that can help tackle stubborn stains. When repeating the cleaning process, be mindful of potential paint sensitivity. Start with the gentlest method possible, gradually increasing intensity only if absolutely necessary. Your goal is complete stain removal without compromising your vehicle’s finish. A successful inspection means the surface appears uniform in color and texture, with no visible remnants of the original stain. Remember that patience and careful observation are your most valuable tools in achieving a completely restored surface that looks as good as new.
Say Goodbye to Stubborn Car Stains with Proven Solutions
You have worked hard to follow every step in removing those persistent car stains, yet the challenge of achieving that flawless, protected finish still lingers. Protecting your car after stain removal can be stressful, especially when you worry about new blemishes or surface damage resurfacing. At Shinykings, we specialize in unique car cleaning products and world-class coatings designed to restore and defend your vehicle’s shine.

Now is your chance to upgrade your car care routine with solutions that deliver visible results. Visit our Bestsellers at Shinykings.com to explore professional-grade cleaners, coatings, and protectants trusted by experts. Do not let stains take over again. Explore our complete range at Shinykings.com and give your vehicle the finish it deserves. Take action today and enjoy a spotless driving experience with lasting protection.
Frequently Asked Questions
How do I determine the type of stain on my car?
You can identify the type of stain by observing its color, texture, and location. Common categories include oil-based stains (like motor oil), water-based stains (like coffee or soda), and organic materials (such as bird droppings or tree sap). Each type requires a different cleaning approach.
What cleaning supplies do I need to remove stains from my car?
You will need microfiber towels, a pH-neutral car wash soap, specialized stain removers, rubbing alcohol, white vinegar, and a gentle degreaser. Having the right tools ensures effective stain removal without damaging your car’s finish.
How should I prepare the area before cleaning a stain?
Start by parking your vehicle in a shaded area to avoid direct sunlight. Rinse the stained area with clean lukewarm water to remove loose dirt before applying any cleaning solutions. Ensure the surface is as clean as possible to prevent scratching during the cleaning process.
What should I do if the stain remains after the first cleaning attempt?
Inspect the area under different lighting conditions to assess the stain’s presence. If any remnants are visible, repeat the cleaning process, potentially using a stronger solution or allowing the cleaner more dwell time. Always start with the gentlest method to protect your car’s finish.