


How to Clean Motorcycle Wheels: A Step-by-Step Guide
Cleaning motorcycle wheels seems simple enough, right? Most riders skip straight to spraying and scrubbing, but they miss what really matters. Using the wrong cleaner can actually destroy your wheel finish in seconds and even cause corrosion that leads to expensive repairs. There is one detail that almost everyone overlooks and it is the difference between wheels that sparkle for years and ones that end up pitted and dull.
Table of Contents
- Step 1: Gather Essential Cleaning Supplies
- Step 2: Prepare Your Motorcycle for Cleaning
- Step 3: Rinse Wheels and Remove Loose Dirt
- Step 4: Clean Wheels with Appropriate Cleaner
- Step 5: Rinse Thoroughly and Dry Completely
- Step 6: Inspect Wheels for Cleanliness and Shine
Quick Summary
| Key Point | Explanation |
|---|---|
| 1. Gather appropriate cleaning supplies | Use microfiber cloths, brushes, and specialized cleaners to prevent damage to your wheels. |
| 2. Prepare your motorcycle for cleaning | Ensure the bike is on a stable surface and sensitive parts are protected. |
| 3. Rinse wheels before deep cleaning | Remove loose dirt with a moderate water stream to prepare for cleaner application. |
| 4. Use the right cleaning solution | Match the cleaner to your wheel material to avoid damage and ensure effectiveness. |
| 5. Conduct a thorough final inspection | Check wheels for cleanliness and consider applying a protective coating for durability. |
Step 1: Gather Essential Cleaning Supplies
Preparing the right cleaning supplies is crucial for effectively cleaning motorcycle wheels without causing damage. Before you start, gathering a comprehensive set of tools and products will make your wheel cleaning process smooth and efficient. Check out our guide on motorcycle cleaning for additional insights into maintaining your motorcycle’s appearance.
Essential Cleaning Tools:
- Soft microfiber cloths (multiple clean cloths)
- Soft bristle brush (non abrasive)
- Wheel cleaning brush with long handle
- Bucket for water
- Garden hose or water source
For cleaning solutions, you will need specialized motorcycle wheel cleaners that are designed to be safe on various wheel materials like aluminum, chrome, and painted surfaces. Avoid household cleaners or harsh chemicals that might strip protective coatings or cause corrosion. Professional motorcycle wheel cleaners are specifically formulated to break down brake dust, road grime, and stubborn dirt without damaging the wheel’s finish.
Select wheel cleaning products compatible with your specific wheel material. Aluminum wheels require different cleaning approaches compared to chrome or powder-coated wheels. Read product labels carefully to ensure you choose a cleaner that matches your wheel type. Some cleaners are acidic and can damage certain wheel finishes, so always verify product compatibility before application.
Additionally, gather protective gear like rubber gloves to shield your hands from cleaning chemicals and potentially sharp wheel edges. Wear old clothes or an apron to protect your clothing from splashes and dirt. Having all your supplies organized and within reach before starting will streamline the wheel cleaning process and help you achieve professional results.
Once you have assembled all necessary supplies, you are ready to move on to the next step of preparing your motorcycle wheels for a thorough cleaning.
Step 2: Prepare Your Motorcycle for Cleaning
Preparing your motorcycle for wheel cleaning requires careful attention to detail and strategic positioning. Explore our essential tips for motorcycle maintenance to understand the broader context of motorcycle care. Before starting the wheel cleaning process, you need to create a safe and accessible workspace that allows you to clean thoroughly without risking damage to your motorcycle or surrounding environment.
Positioning and Stabilization
Choose a flat, stable surface like a concrete driveway or a well-ventilated garage area with good drainage. If possible, use a motorcycle stand or center stand to elevate the bike, which provides better access to the wheels and prevents strain on your back during cleaning. When using a stand, ensure it is rated for your motorcycle’s weight and securely positioned to prevent any potential tipping.
Before beginning the cleaning process, perform a quick visual inspection of your wheels. Check for any loose spokes, visible damage, or excessive debris that might require special attention. Remove any large pieces of dirt or debris manually to prevent scratching the wheel surface during the cleaning process. Pay special attention to the areas around the valve stem and between wheel spokes, where dirt and grime tend to accumulate.
Protective Measures
Protect sensitive motorcycle components from water and cleaning solutions. Cover the exhaust pipe with a plastic bag to prevent water intrusion, and consider using plastic wrap or waterproof covers on electrical components like the battery and ignition system. If your motorcycle has disc brakes, be extra careful to avoid getting cleaning solutions on the brake rotors or pads, as this can compromise braking performance.
Ensure you have good lighting and are wearing appropriate clothing that allows free movement. Rubber gloves will protect your hands from harsh cleaning chemicals, and wearing old clothes or an apron will shield you from potential splashes. With your motorcycle securely positioned and sensitive areas protected, you are now ready to begin the wheel cleaning process with confidence and precision.
Step 3: Rinse Wheels and Remove Loose Dirt
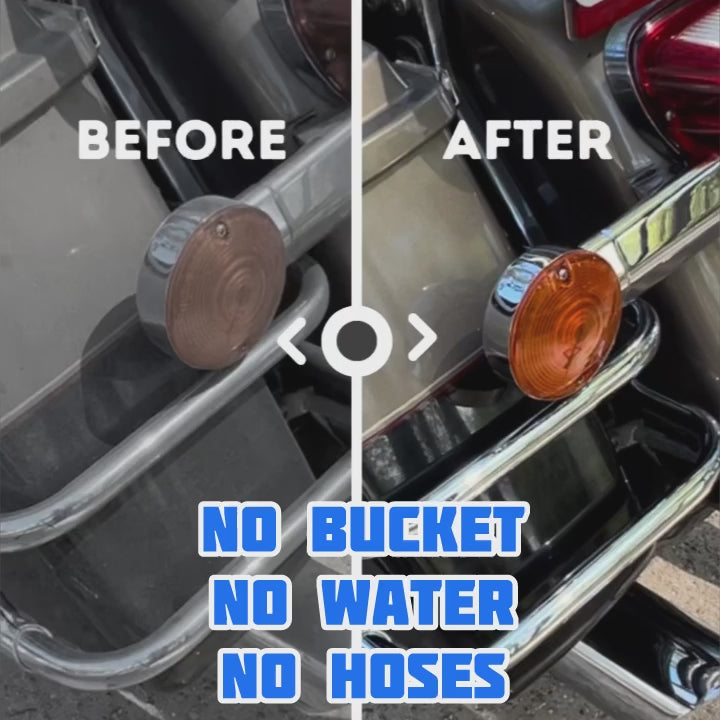
Rinsing your motorcycle wheels is a critical first step in the cleaning process that helps remove loose dirt, road grime, and initial layers of debris before applying specialized cleaning solutions. Learn more about our waterless cleaning techniques to complement your wheel maintenance routine.
Initial Rinsing Technique
Begin by using a garden hose with a moderate water pressure setting to spray down the entire wheel surface. Angle the water stream strategically to dislodge dirt from hard-to-reach areas like spoke intersections, rim edges, and around the brake rotor. Start from the top of the wheel and work your way down, allowing gravity to help carry away loose particles. Avoid using high-pressure water streams, which can potentially damage wheel bearings or force water into sensitive mechanical components.
Pay special attention to areas where brake dust accumulates, such as near the brake caliper and between wheel spokes. These regions tend to collect the most stubborn dirt and require careful, thorough rinsing. Move the water stream in multiple directions to ensure you are effectively removing dirt from all angles. The goal is to create a clean surface that will make subsequent cleaning steps more effective and prevent potential scratching during the detailed cleaning process.
Dirt Removal Considerations
If you notice particularly stubborn dirt or mud that does not rinse away easily, use a soft bristle brush to gently agitate the surface. Hold the brush at a 45-degree angle and use light, sweeping motions to avoid scratching the wheel finish. For wheels with intricate spoke designs or complex patterns, consider using a specialized wheel cleaning brush with soft, flexible bristles that can reach into tight spaces.
Once you have completed the initial rinse, take a moment to visually inspect the wheel. The surface should appear free of large dirt particles and have a uniform, wet appearance. Shake off excess water and prepare your wheel for the next detailed cleaning stage. By thoroughly rinsing and removing loose dirt, you are setting the foundation for a comprehensive and effective motorcycle wheel cleaning process.
Step 4: Clean Wheels with Appropriate Cleaner
Selecting and applying the right cleaning solution is crucial for maintaining your motorcycle wheels without causing damage. Explore our specialized motorcycle cleaning solutions to ensure optimal wheel maintenance and protection.
Choosing the Right Cleaner
Different wheel materials require specific cleaning approaches. Aluminum wheels demand a pH-neutral cleaner that effectively removes brake dust and road grime without stripping protective coatings. Chrome wheels need gentler treatment to prevent oxidation, while powder-coated wheels require special non-abrasive solutions. Avoid household cleaners or generic automotive products that might contain harsh chemicals potentially damaging your wheel’s finish.
Before application, shake your chosen wheel cleaner thoroughly to ensure all ingredients are well mixed. Pour a small amount into a clean spray bottle or use the product’s provided applicator. Work in a shaded area to prevent the cleaning solution from drying too quickly, which can leave unsightly water spots or residue. Apply the cleaner systematically, starting from the bottom of the wheel and working upward to prevent drip marks and ensure complete coverage.
Cleaning Technique
Use a soft bristle brush or microfiber cloth to gently work the cleaning solution into the wheel surface. Move the brush in circular motions, paying extra attention to areas with heavy brake dust accumulation near the rotor and spoke intersections. For intricate wheel designs, consider using a detailing brush with soft, flexible bristles that can reach tight spaces without scratching the surface.
Allow the cleaning solution to sit for the manufacturer’s recommended time typically between 30 seconds to 2 minutes. This dwell time helps break down stubborn dirt and brake dust without risking damage to the wheel’s finish. Avoid letting the cleaner dry completely by working in small sections and rinsing promptly.
After cleaning, your wheel should appear uniformly clean with no visible dirt, brake dust, or cleaning solution residue. The surface should have a consistent shine without streaks or water spots, indicating a thorough and successful cleaning process.
Step 5: Rinse Thoroughly and Dry Completely
Rinsing and drying your motorcycle wheels is a critical final step that prevents water spots, potential corrosion, and ensures a pristine finish. Discover more about deep cleaning techniques to enhance your motorcycle maintenance routine.
Comprehensive Rinsing Process
Begin by using a gentle water stream to thoroughly rinse away all cleaning solution and remaining dirt particles. Start from the top of the wheel and work downward, ensuring complete coverage of every surface area including spoke intersections, rim edges, and areas around the brake rotor. Use a moderate water pressure that effectively removes residue without forcing water into sensitive mechanical components. Rotate the wheel slowly during rinsing to guarantee that no area is left with lingering cleaning solution or dirt.
Pay special attention to hard-to-reach areas where soap and dirt can accumulate. Use your fingers or a soft brush to gently manipulate areas with complex geometries, ensuring that all cleaning solution is completely washed away. The goal is to create a uniformly clean surface with no visible soap residue or water droplets containing dissolved cleaning agents.

Strategic Drying Technique
Immediate and thorough drying is crucial to prevent water spot formation and potential oxidation. Use multiple clean, soft microfiber towels dedicated specifically to wheel drying. Begin by gently shaking excess water from the wheel, then methodically pat and wipe the surface using a blotting motion rather than aggressive rubbing. Focus on absorbing water from spoke intersections, rim edges, and any areas with intricate designs.
For wheels with complex spoke patterns or tight spaces, consider using compressed air or a leaf blower on its lowest setting to remove water from hard-to-reach areas. Hold the air source at a slight angle to prevent pushing water deeper into wheel mechanisms. Your final inspection should reveal a completely dry wheel with a uniform, streak-free appearance. No water droplets, soap residue, or moisture should remain, signaling a successful and comprehensive wheel cleaning process that protects your motorcycle’s aesthetic and mechanical integrity.
Step 6: Inspect Wheels for Cleanliness and Shine
A meticulous inspection after cleaning ensures your motorcycle wheels are not just clean, but also protected and maintained to the highest standard. Explore our waterless motorcycle cleaning solutions to complement your wheel maintenance routine.
Visual and Tactile Inspection
Begin your inspection by examining the wheel under good lighting conditions. Natural daylight provides the best environment for detecting any remaining dirt, water spots, or imperfections. Hold the wheel at different angles, rotating it slowly to catch light reflection and reveal any missed areas or residual grime. Run your clean, gloved hand gently across the wheel surface, feeling for any rough patches, embedded particles, or areas that might require additional attention.
Pay special attention to spoke intersections, rim edges, and areas around the brake rotor where dirt and brake dust tend to accumulate. Check for any signs of corrosion, paint damage, or potential wheel structural issues that might have been hidden by dirt. A clean wheel should have a uniform appearance with a consistent shine, free from streaks, water spots, or cleaning solution residue.
Final Detailing and Protection
If you notice any remaining spots or imperfections, use a clean microfiber cloth to gently buff the affected areas. For wheels with minor water spots, a quick wipe with a slightly damp microfiber cloth can often resolve the issue. Consider applying a wheel sealant or protective coating to provide an additional layer of protection against future dirt accumulation and environmental contaminants.
Your final verification should include a comprehensive visual and tactile assessment. The wheel should have a mirror-like shine with no visible dirt, water spots, or cleaning residue. When light hits the surface, it should reflect uniformly without any dull or streaky areas. By completing this thorough inspection, you not only ensure a pristine wheel appearance but also contribute to the long-term maintenance and performance of your motorcycle’s most critical rolling components.
Below is an organized checklist to help you verify your wheels are perfectly cleaned and protected after following all the recommended steps.
| Inspection Area | What to Look For | Action if Issue Found |
|---|---|---|
| Surface Cleanliness | No dirt, brake dust, or cleaning residue | Re-clean affected areas |
| Water Spots/Streaks | Uniform shine, no spots or streaks | Buff with microfiber cloth |
| Surface Texture | Smooth feel, no rough patches or debris | Spot clean and inspect closely |
| Spoke Intersections | Cleaned, free of grime and build-up | Use detailing brush if needed |
| Rim Edges | Consistent finish, no leftover residue | Wipe or buff edge areas |
| Around Brake Rotor | Free from dust and cleaning solution | Re-clean and dry these regions |
| Protective Coating | Evenly applied, no haze or streaks | Reapply or buff as necessary |
| Corrosion or Damage | No new rust, paint chips, or visible defects | Note issue and address separately |
Elevate Your Wheel Care Routine with Specialized Solutions
Struggling to achieve spotless, protected motorcycle wheels? If you find regular cleaning leaves behind brake dust, stubborn grime, or lacks the lasting shine you crave, you are not alone. Many riders face recurring dirt buildup, water spots, and concern over damaging their wheel’s finish. Our article breaks down each crucial step needed to reach that professional, streak-free clean. But to truly protect your investment and enjoy wheels that turn heads, you need proven tools developed for motorcycle detailing.
Explore Motorcycle Cleaners & Coatings that are specifically engineered to tackle baked-on debris and deliver a brilliant, long-lasting finish. Trust our advanced formulations to shield aluminum, chrome, and painted surfaces from harsh elements.

Ready for showroom results every ride? Discover the best motorcycle cleaners and graphene coatings trusted by passionate riders. See why enthusiasts choose us as their go-to source for exclusive care products. Visit ShinyKings and upgrade your wheel cleaning with solutions made for lasting shine and real protection. Start making your wheels stand out and safeguard them today.
Frequently Asked Questions
How often should I clean my motorcycle wheels?
It’s recommended to clean your motorcycle wheels every couple of weeks, or more frequently if you ride in wet or muddy conditions. Regular cleaning helps maintain the appearance and function of the wheels.
Can I use regular household cleaners on motorcycle wheels?
No, you should avoid household cleaners as they can contain harsh chemicals that may damage the wheel’s finish. Instead, opt for specialized motorcycle wheel cleaners designed for specific wheel materials.
What type of cleaning tool is best for motorcycle wheels?
Soft bristle brushes and microfiber cloths are ideal for cleaning motorcycle wheels. They are non-abrasive and effective at reaching into tight spaces without scratching the wheel surface.
Should I apply a protective coating after cleaning my motorcycle wheels?
Yes, applying a wheel sealant or protective coating can help maintain your wheels’ shine and protect them from dirt and environmental contaminants in the future.
Recommended
- Best Way to Clean Motorcycle for a Sparkling Finish – shinykingsinc
- The best Essential Tips for Maintaining Your Motorcycle’s Shine – shinykingsinc
- Wash&Shine 66 Waterless Motorcycle Cleaner Kit – 2x16 oz + 2xTowels – shinykingsinc
- Wash&Shine 66 Waterless Motorcycle Cleaner – 4x16.9 fl. oz + 4 Towels – shinykingsinc
- How to Clean Siding on House: Easy Tips for a Fresh Look | Sabatalo Contracting
- How to Clean Hot Tub Cover: Easy Step-by-Step Guide - ClearSpa™