


How to Apply Ceramic Coating for Maximum Protection
Getting a ceramic coating on your car sounds high-tech and intimidating, right? Yet a single layer can make water bead up perfectly and protect paint for years. Most people assume the hard part is the chemical, but it turns out your actual results depend way more on slow and careful surface prep than anything inside the bottle.
Table of Contents
- Step 1: Prepare Your Surface Thoroughly
- Step 2: Choose the Right Ceramic Coating
- Step 3: Clean and Decontaminate the Area
- Step 4: Apply the Ceramic Coating Evenly
- Step 5: Allow the Coating to Cure Properly
- Step 6: Inspect and Maintain for Longevity
Quick Summary
| Key Point | Explanation |
|---|---|
| 1. Thoroughly prepare your surface | Clean with a professional degreaser to ensure optimal ceramic coating adhesion and durability. |
| 2. Choose the right coating type | Select a ceramic coating based on material compatibility and environmental challenges for effective protection. |
| 3. Use precise application techniques | Apply the coating using a cross-hatch pattern for even coverage, which enhances durability and appearance. |
| 4. Allow proper curing conditions | Maintain stable temperature and humidity to ensure the coating properly bonds during the curing process. |
| 5. Perform regular maintenance checks | Regularly inspect and clean the coated surface to maintain its protective qualities and extend its lifespan. |
Step 1: Prepare Your Surface Thoroughly
Successful ceramic coating application begins with meticulous surface preparation. This critical first step determines how effectively your coating will bond and protect the surface.
 Proper preparation ensures maximum durability, prevents potential coating failures, and creates a smooth foundation for optimal protection.
Begin by thoroughly cleaning the surface using a professional degreaser and lint-free microfiber towels. Avoid household cleaners which can leave residues that interfere with coating adhesion. Instead, select specialized automotive or industrial cleaning solutions designed to remove contaminants completely. Work in a well-ventilated area with consistent temperature to ensure the best preparation conditions.
Next, inspect the surface for any imperfections like scratches, oxidation, or previous coating remnants. These must be addressed before ceramic coating application. Use clay bars or a professional surface preparation solution to remove embedded contaminants and create a clean slate. For automotive surfaces, read more about professional surface preparation techniques that ensure optimal coating performance.
The final preparatory stage involves mechanical decontamination. This means using specialized compounds to remove microscopic impurities that standard cleaning might miss. A compound polish helps eliminate minor surface imperfections and creates a perfectly smooth surface. Use slow, consistent motions with a microfiber applicator or orbital polisher, working in small sections to guarantee comprehensive coverage.
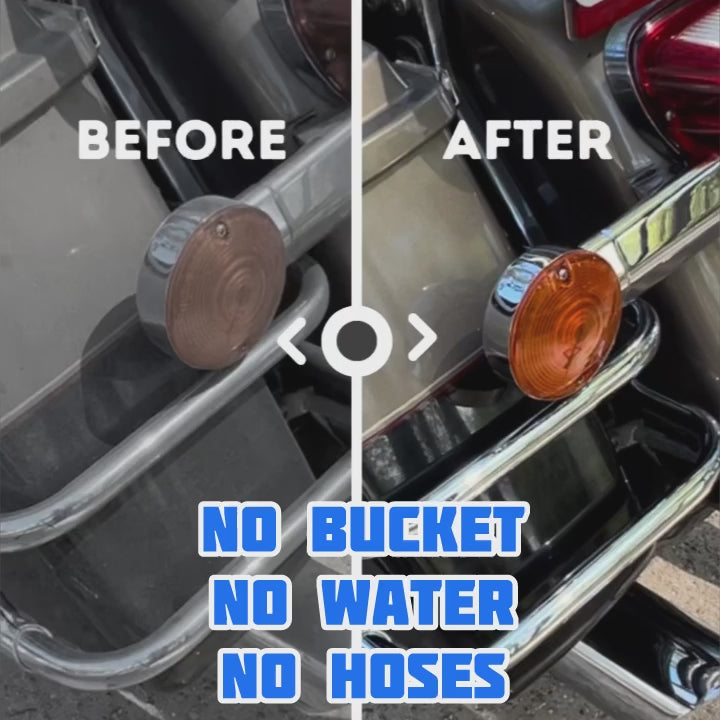
To verify your surface is ready, perform a water beading test. Apply a small amount of water to the prepared surface. If the water forms tight, uniform beads without spreading, your surface is likely prepared correctly. Any uneven water spread indicates further cleaning or preparation is necessary before proceeding with ceramic coating application.
Here is a checklist table to help you verify each major stage is completed before moving on to ceramic coating application.
| Stage | Verification Method | Criteria for Completion |
|---|---|---|
| Initial Cleaning | Water beading test | Water forms tight, uniform beads |
| Surface Inspection | Visual check for imperfections | No visible scratches or oxidation |
| Mechanical Decontamination | Final compound polish | Surface feels smooth and free of residue |
| Chemical Decontamination | Tape test | No residue or debris on removed tape |
| Alcohol Wipe-Down | Surface feels dry and streak-free | No oily or greasy film remains |
| Post-Curing Inspection | Visual and tactile inspection; water beading | Uniform gloss, smooth touch, tight water beads |
Step 2: Choose the Right Ceramic Coating
Selecting the appropriate ceramic coating is a pivotal decision that directly impacts the protection and appearance of your surface. Not all ceramic coatings are created equal, and understanding the nuanced differences can mean the difference between exceptional protection and disappointing results.
Begin by evaluating the specific surface you plan to coat. Different ceramic coatings are formulated for various materials like automotive paint, glass, metal, or stone surfaces. Ceramic coating composition matters significantly. Some coatings offer superior UV protection, while others excel in heat resistance or chemical durability. Consider the primary environmental challenges your surface encounters. For automotive applications, learn more about nano ceramic coating technologies that provide advanced protection against environmental contaminants.
Next, assess the coating’s durability and longevity. Professional-grade ceramic coatings typically range from 2H to 10H hardness levels, with higher numbers indicating greater scratch resistance. Thickness and chemical composition are key factors. Thicker coatings generally provide more substantial protection but require more meticulous application. Look for coatings that offer multiple years of protection and come with clear manufacturer warranties.
Consider your application environment and skill level. Some ceramic coatings require professional application with specialized equipment, while others are designed for DIY enthusiasts. Evaluate your comfort level with detailed application processes. Professional-grade coatings often demand precise environmental conditions like controlled temperature and humidity, strict surface preparation, and advanced application techniques.
To verify you’ve chosen the right coating, confirm these critical criteria: compatibility with your specific surface material, expected durability, ease of application, and protection against your primary environmental challenges. Request manufacturer technical specifications and user reviews to validate performance claims.
The following table summarizes the main types of ceramic coatings, their key features, and appropriate usage scenarios to help you select the right one for your needs.
| Coating Type | Main Features | Best For | Application Difficulty |
|---|---|---|---|
| Standard DIY Coating | Good basic protection; easy to apply | Personal vehicles, quick jobs | Low |
| Professional Grade | High hardness (8H-10H); longer lifespan | Commercial or premium vehicles | High |
| Specialized Formulas | Enhanced UV/heat/chemical resistance | Unique surfaces or climates | Moderate/High |
| A high-quality ceramic coating should provide clear documentation about its protective capabilities, application requirements, and expected lifespan. |
Step 3: Clean and Decontaminate the Area
Thorough cleaning and decontamination represent the most critical preparation stage for ceramic coating application. This process eliminates microscopic contaminants that could compromise coating adhesion and performance. Precision matters more than speed when preparing your surface for protection.
Begin with a professional-grade degreasing solution specifically designed for your surface type. Automotive surfaces require different cleaning approaches compared to stone or metal surfaces. Use lint-free microfiber towels to prevent introducing additional particles during cleaning. Learn more about deep cleaning techniques that ensure comprehensive surface preparation. Work systematically in small sections, applying cleaning solution with consistent, overlapping motions to guarantee complete coverage.
Chemical decontamination is crucial. Use specialized clay bars or chemical decontamination solutions to remove embedded industrial fallout, tree sap, road tar, and other stubborn contaminants. These microscopic particles can create barriers preventing proper ceramic coating adhesion. Gently glide the clay bar across the surface using a lubricating solution, allowing it to lift contaminants without causing scratches. For particularly challenging surfaces, consider using a professional-grade iron removal solution that targets metallic particles invisible to the naked eye.
After chemical decontamination, perform a final alcohol wipe-down using high-purity isopropyl alcohol. This step removes any remaining oils or residues from previous cleaning stages. Work in a clean, dust-free environment to prevent recontamination. Use fresh, clean microfiber towels and apply the alcohol solution in straight, overlapping lines to ensure complete surface coverage.
Here is a summary of essential tools and materials mentioned for the ceramic coating process, with recommendations on what each is used for.
| Tool/Material | Purpose | Notes/Special Considerations |
|---|---|---|
| Degreasing Solution | Removes oils and residues | Use professional-grade, surface-appropriate |
| Clay Bar/Decontamination | Removes embedded contaminants | Use with lubricant to avoid scratches |
| Microfiber Towels | Wiping and buffing without lint | Use multiple clean towels for separate steps |
| Compound Polish | Mechanical removal of microscopic impurities | Use with applicator pad/orbital polisher |
| Isopropyl Alcohol | Final wipe-down to remove oils/residues | High-purity recommended |
| Applicator Pad | Applies ceramic coating evenly | Use cross-hatch technique for best results |
| Infrared Curing Lamps | Accelerates uniform curing (optional) | Used in professional environments |
To verify successful decontamination, perform a simple tape test. Press a piece of clean masking tape onto the surface and then remove it. If no residue appears on the tape, your surface is likely clean and ready for ceramic coating application. Any discoloration or particles on the tape indicate the need for additional cleaning and decontamination.
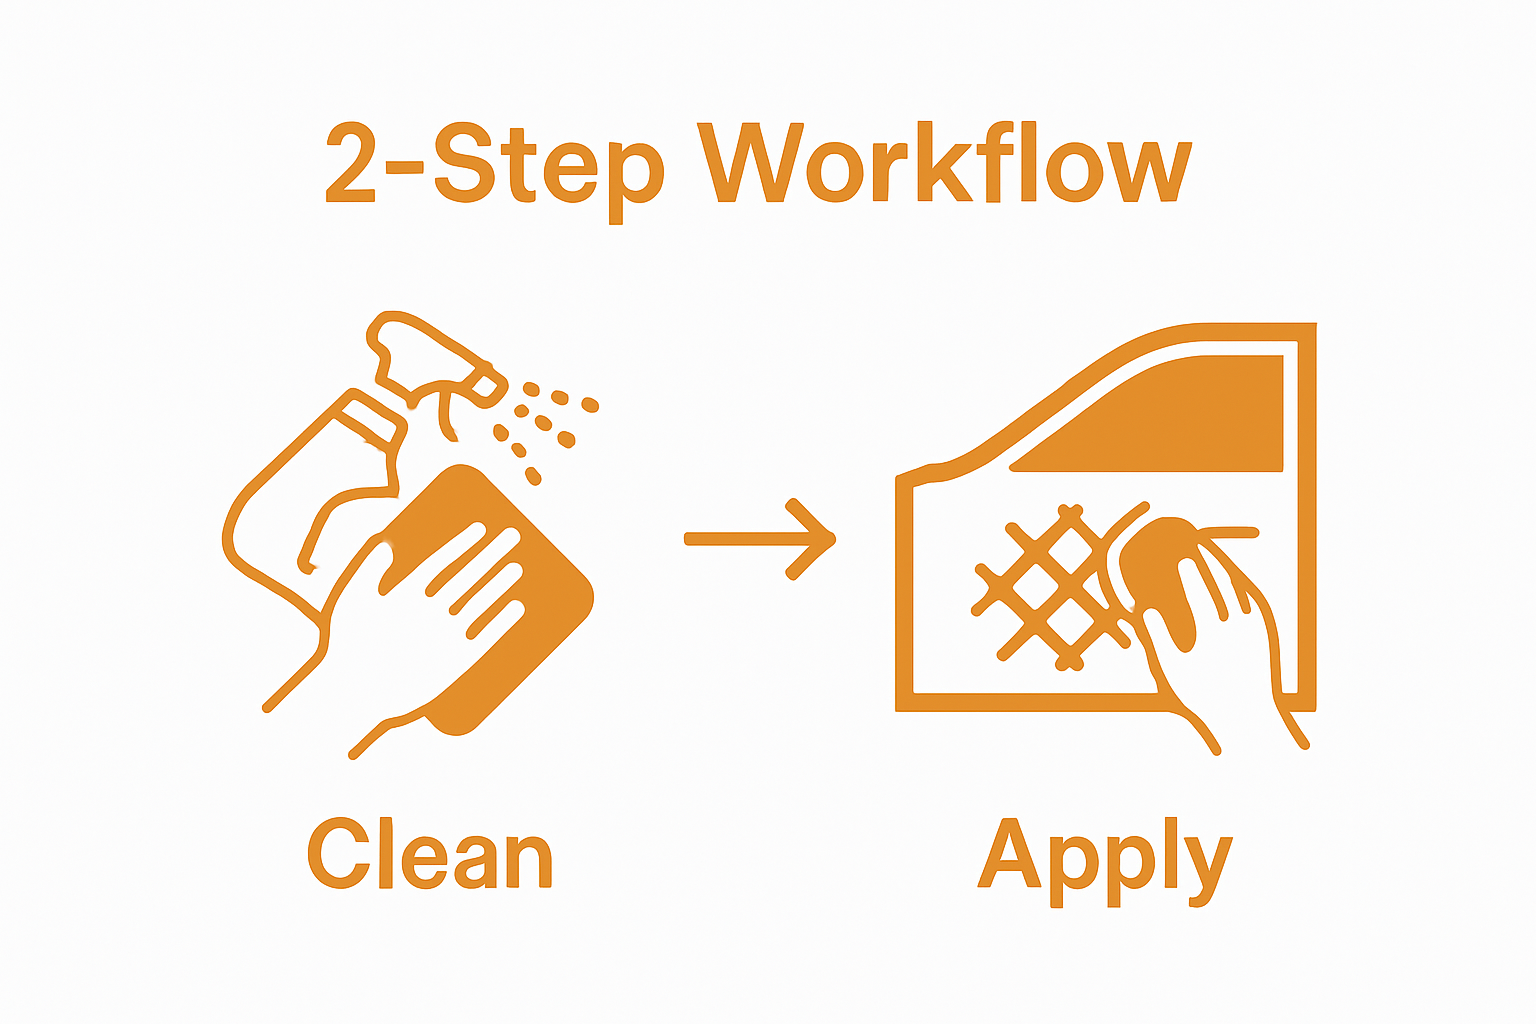
Step 4: Apply the Ceramic Coating Evenly
Ceramic coating application demands precision, patience, and a methodical approach. The quality of your application directly determines the coating’s effectiveness and longevity. Uneven application can lead to inconsistent protection, reduced durability, and an unsatisfactory final appearance.
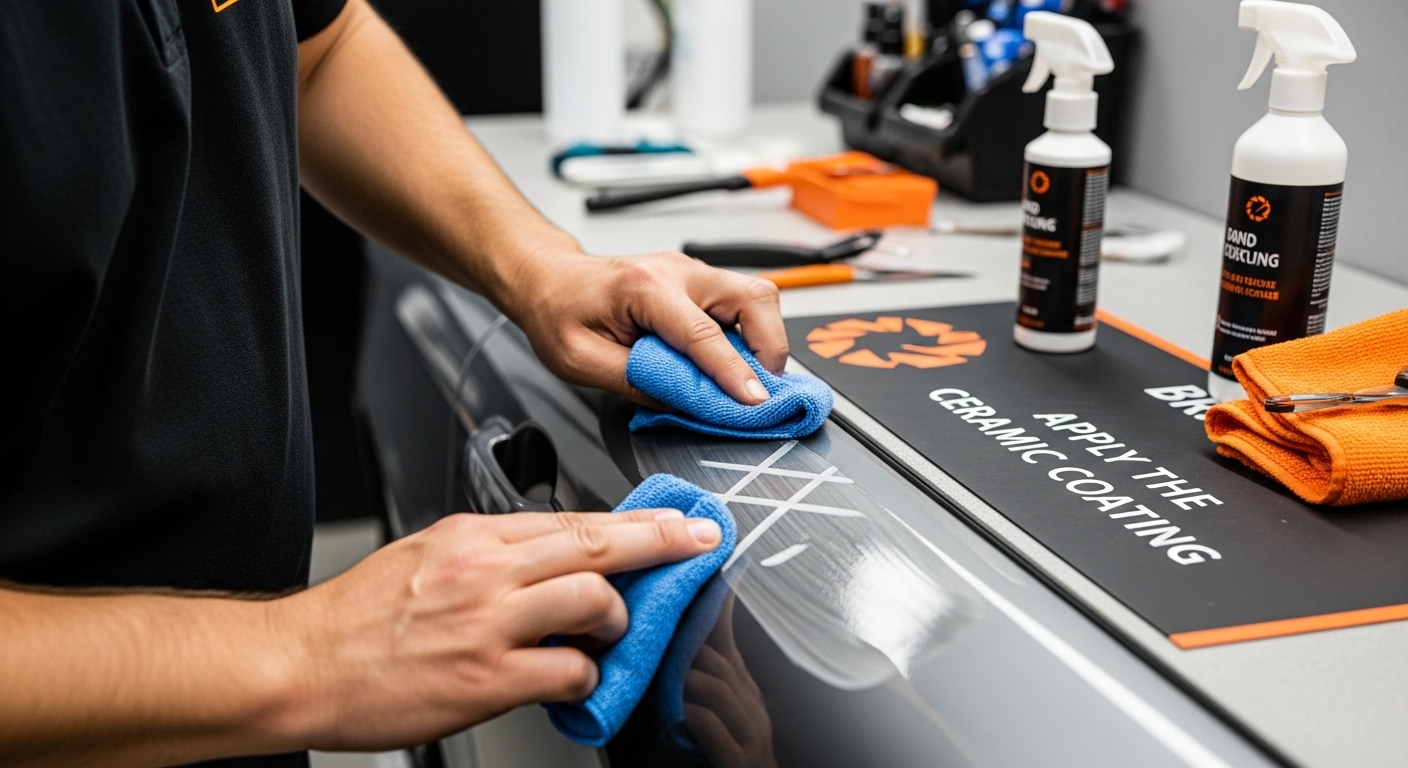
Prepare your workspace by selecting a clean, dust-free environment with consistent temperature and minimal direct sunlight. Use high-quality microfiber applicator pads specifically designed for ceramic coating application. Explore professional DIY coating techniques to understand the nuanced application process. Apply a small amount of ceramic coating to the applicator pad, ensuring even distribution. Work in controlled, systematic sections to maintain consistent coverage.
Utilize the cross-hatch technique when applying the ceramic coating. Begin by applying the product in horizontal lines, then immediately follow with vertical lines, creating a crosshatch pattern. This method ensures comprehensive and uniform coverage, minimizing the risk of missed spots or uneven application. Use light, consistent pressure and overlap each stroke slightly to guarantee complete surface saturation. Avoid excessive product application, which can lead to difficult removal and potential streaking.
After initial application, allow the coating to sit for the manufacturer’s recommended flash time. This period enables the ceramic coating to bond with the surface at a molecular level. Use a clean, dry microfiber towel to buff the surface gently, removing any excess product and creating a smooth, uniform finish. Look for a consistent, glossy appearance with no visible streaks or high spots.
To verify successful application, perform a water beading test after the recommended curing time. Sprinkle water onto the coated surface. Perfect ceramic coating application will cause water to form tight, uniform beads that quickly roll off the surface. Uneven beading or water spreading indicates areas that may require reapplication or additional attention.
Step 5: Allow the Coating to Cure Properly
The curing process is where ceramic coating transforms from a liquid application to a durable protective layer. Proper curing is not just a waiting game but a critical chemical bonding process that determines the coating’s long-term performance and durability. Rushing or neglecting this stage can compromise the entire ceramic coating investment.
Immediately after application, create an ideal curing environment. Temperature and humidity are crucial factors. Most ceramic coatings require a stable environment between 60-80 degrees Fahrenheit with low humidity levels. Avoid direct sunlight, which can cause uneven curing and potential coating defects. If possible, explore professional curing techniques to understand the nuanced environmental requirements for optimal results.
Follow the manufacturer’s specific curing instructions meticulously. Different ceramic coatings have unique curing protocols some require 24-48 hours of minimal contact, while others might need specific environmental conditions or additional heat activation. During the initial curing period, keep the surface completely dry and free from contaminants. Avoid washing, touching, or exposing the coated surface to water, dirt, or chemical substances that could interrupt the molecular bonding process.
Consider using infrared curing lamps for professional-grade ceramic coatings. These specialized tools can help accelerate and uniformize the curing process by providing controlled, consistent heat. However, exercise caution and follow manufacturer guidelines precisely to prevent overheating or uneven curing. The goal is to facilitate a smooth, complete molecular bond between the ceramic coating and the surface.
To verify successful curing, perform a comprehensive visual and tactile inspection after the recommended curing time. The surface should appear uniformly glossy with no streaks, high spots, or inconsistent areas. Gently run your hand over the surface the coating should feel smooth and integrated. A water beading test can also confirm proper curing water should form tight, uniform beads that quickly roll off the surface, indicating a complete and successful ceramic coating application.
Step 6: Inspect and Maintain for Longevity
Ceramic coating maintenance is not a one-time event but an ongoing commitment to preserving your surface’s protection and appearance. Consistent care determines the coating’s ultimate performance and durability. Think of your ceramic coating like a high-performance shield that requires periodic attention to remain effective.
Establish a regular inspection routine that involves careful visual and tactile examination of the coated surface. Conduct monthly inspections looking for signs of wear, potential damage, or areas where the coating might be compromising. Explore essential maintenance techniques to understand the nuanced care requirements. Pay special attention to high-contact or frequently exposed areas which may experience more rapid coating deterioration.
Clean the ceramic-coated surface using specialized maintenance products recommended by the coating manufacturer. Avoid harsh chemicals or abrasive cleaning tools that could compromise the coating’s integrity. Use pH-neutral, ceramic-coating-specific cleaning solutions and soft microfiber towels. When washing, employ the two-bucket method to minimize potential scratching. Gentle, consistent cleaning preserves the coating’s molecular structure and prevents contaminant buildup that could degrade protection over time.
Implement a strategic maintenance schedule based on the specific environment and usage of your coated surface. Automotive surfaces exposed to harsh conditions might require more frequent care compared to indoor surfaces. Consider creating a maintenance log to track cleaning dates, products used, and any observed changes in the coating’s performance. This documentation helps you understand your coating’s long-term behavior and identify potential issues before they become significant problems.
To verify ongoing coating effectiveness, perform regular water beading tests. A healthy ceramic coating will cause water to form tight, uniform beads that quickly roll off the surface. Diminished water beading or uneven water distribution indicates the coating may require professional assessment or potential reapplication. Remember that proper maintenance can extend your ceramic coating’s protective capabilities well beyond its initial expected lifespan.
Transform Your Ceramic Coating Results With ShinyKings Solutions
Applying ceramic coating for maximum protection can feel overwhelming. Common frustrations include difficulty finding the right products, uncertainty about preparation steps, and the challenge of achieving a flawless, long-lasting finish. If you want to avoid failed bonding, streaks, or short-lived shine, you need solutions designed for perfect adhesion and extended durability. That is where ShinyKings comes in. Discover our Bestsellers collection trusted by DIYers and professionals for advanced surface preparation and powerful protection.

Experience what true surface protection feels like. Our specialized ceramic coating and cleaning products support every stage from deep cleaning to expert-level application. Visit ShinyKings.com today to explore the best solutions for your next project. Take action now and give your surfaces the shield they deserve for years to come.
Frequently Asked Questions
What is the importance of surface preparation before applying ceramic coating?
Proper surface preparation is crucial because it ensures maximum bonding and durability of the ceramic coating. Thorough cleaning and decontamination remove impurities that could compromise the coating’s adhesion and performance.
How can I choose the right ceramic coating for my specific surface?
To choose the right ceramic coating, evaluate the surface type you plan to coat (such as automotive paint, glass, or metal) and consider factors like durability, expected environmental challenges, and whether you prefer a DIY application or professional service.
What are the key steps in the ceramic coating application process?
The key steps include thorough surface cleaning and decontamination, even application of the coating using a cross-hatch technique, allowing the coating to cure properly, and regular maintenance to ensure long-lasting protection.
How do I know if my ceramic coating has cured properly?
After the recommended curing time, check the surface for a uniform glossy appearance without streaks. Performing a water beading test can also indicate success; tight, uniform beads indicate a well-cured coating.